The Best Screen Recorders No Watermark for Mac Users
You've spent hours crafting the perfect tutorial or product demo on your Mac, meticulously editing every frame. Then, when you export the final file, a massive, distracting watermark is plastered right across your hard work. It's a frustratingly common experience, and it's why finding a solid screen recorder with no watermark is non-negotiable for anyone creating professional content on a Mac.
Why Watermarks Can Sabotage Your Videos
Let's be honest: a watermark isn't just a tiny visual hiccup. It's a loud declaration that you used a free or trial version of a tool, and that small detail can instantly chip away at your credibility.
When viewers see another company's logo on your content, it sends a subtle message that you might not be fully invested in your own work. It distracts from what you're trying to say and pulls their attention to the software you used. This is the last thing you want when you're trying to land a new client, teach a complex skill, or demo your own product.
The Real Price of "Free" Recorders
The allure of "free" is strong, but the hidden cost of a watermark often shows up in lost opportunities and a weakened brand image.
Just think about it:
- Marketing Videos: A watermarked promo can make your brand look amateurish, potentially deterring customers who expect a premium experience.
- Online Courses: If you're an instructor, watermarks can make your educational content seem less authoritative, causing students to question your expertise.
- Client Walkthroughs: Sending a client a recording covered in another company's branding can come across as unprepared and unprofessional.
There’s a reason the screen recording software market is booming. Valued at over USD 1.2 billion, it's expected to more than double by 2033. Professional recording is no longer just for big studios; it's an essential tool for modern communication. You can read more about the screen recording software market growth.
A watermark-free video isn't just a vanity project. It’s a strategic choice. It tells your audience you're serious, you value their time, and you stand behind the quality of your work.
Build Your Brand, Not Someone Else's
At the end of the day, every video you publish is a chance to strengthen your own brand. Using screen recorders with no watermark ensures the only logo your audience sees is yours.
This is critical for creators focused on growth. The polished, professional look you get from a clean recording is a key ingredient for building viewer trust and eventually monetizing your efforts. The entire business model of a monetized YouTube channel, for example, relies on presenting high-quality content that keeps people coming back.
Choosing the right tool for your Mac is the first step in making sure every recording reinforces your expertise and builds your brand, not someone else's.
Using Your Mac's Built-In Recording Tools
Before you even start looking for third-party apps, it’s worth checking out the powerful, watermark-free recorders already on your Mac. A lot of people don't realize Apple gives you two fantastic, free options that are perfect for simple recording jobs.
These built-in tools are my go-to for things like quickly capturing a software bug to report it or making a short how-to clip for a colleague. They're ready in seconds, with zero installation needed.
The Screenshot Toolbar: A Quick and Versatile Tool
One of the easiest ways to start recording is with the Screenshot toolbar. Just hit the keyboard shortcut Shift-Command-5.
This brings up a small control panel at the bottom of your screen with options for still images and video. You can choose to record your entire screen or just drag a box around a specific area. It's incredibly handy for creating short clips on the fly.
Diving Deeper with QuickTime Player
For a bit more control, there’s QuickTime Player. Most people think of it as just a video player, but it’s a surprisingly capable recorder.
Open the app, go to File > New Screen Recording, and a small recording window will pop up. From there, you can select the recording area and—this is key—choose your audio source.
Pro Tip: A common "gotcha" with Mac’s built-in tools is that they record your microphone but not the sound coming from your computer itself. If you need to capture audio from an application, it requires a little extra setup. We've put together a guide on how to record system audio on your Mac to walk you through it.
Both the Screenshot toolbar and QuickTime are great starting points, but they have their limits, especially when you need a more polished final video. Think of them as tools for capturing, not creating.
Here’s where you’ll start to feel their constraints:
- Integrated Editing: There's no built-in way to trim clips, add text or arrows, or stitch multiple recordings together.
- Webcam Overlays: You can't easily record your screen and your webcam at the same time for that classic picture-in-picture look.
- Advanced Features: Forget about dynamic zoom, custom backgrounds, or highlighting your cursor to guide the viewer's eye.
These limitations are important to understand. For a quick, no-fuss recording, the built-in tools are perfect. But the moment you need to create a professional demo, a detailed tutorial, or a marketing video, you'll know it's time to find a dedicated screen recorder that offers those creative features without slapping on a watermark.
Picking the Right Screen Recorder for Your Mac
With so many screen recorders out there for macOS, finding the right one can feel like a chore. The secret is to stop looking for the "best" tool and start looking for the right tool for the job at hand.
After all, the needs of a startup founder creating a pitch video are miles apart from a support agent recording a quick troubleshooting guide. Your decision really comes down to a few key things: how easy it is to use, what kind of editing power you need, whether you need to record your webcam, and of course, the price.
The demand for these tools has exploded. The COVID-19 lockdown was a major catalyst, driving huge growth in video recording and training software. We're now seeing the fastest growth among individual users—people just like you creating their own tutorials and demos. You can dig into more of the data on the growth of the screen recording market if you're curious.
What Are You Actually Recording?
Before you download anything, take a moment to think about what you’re trying to create. Is this a quick, throwaway clip for a coworker, or is it a polished video that will represent your brand for months to come?
- For quick bug reports or internal how-tos: Honestly, your Mac's built-in tools are probably all you need. They're fast, free, and get the job done without any fuss.
- For detailed tutorials or course content: This is where you’ll want features like cursor highlighting, dynamic zoom, and the ability to record your webcam at the same time.
- For polished marketing videos or product demos: Now you should be looking for things like 4K export quality, custom backgrounds, and solid editing features to create a professional final cut.
This flowchart can help you visualize whether you need a simple tool or something more advanced.
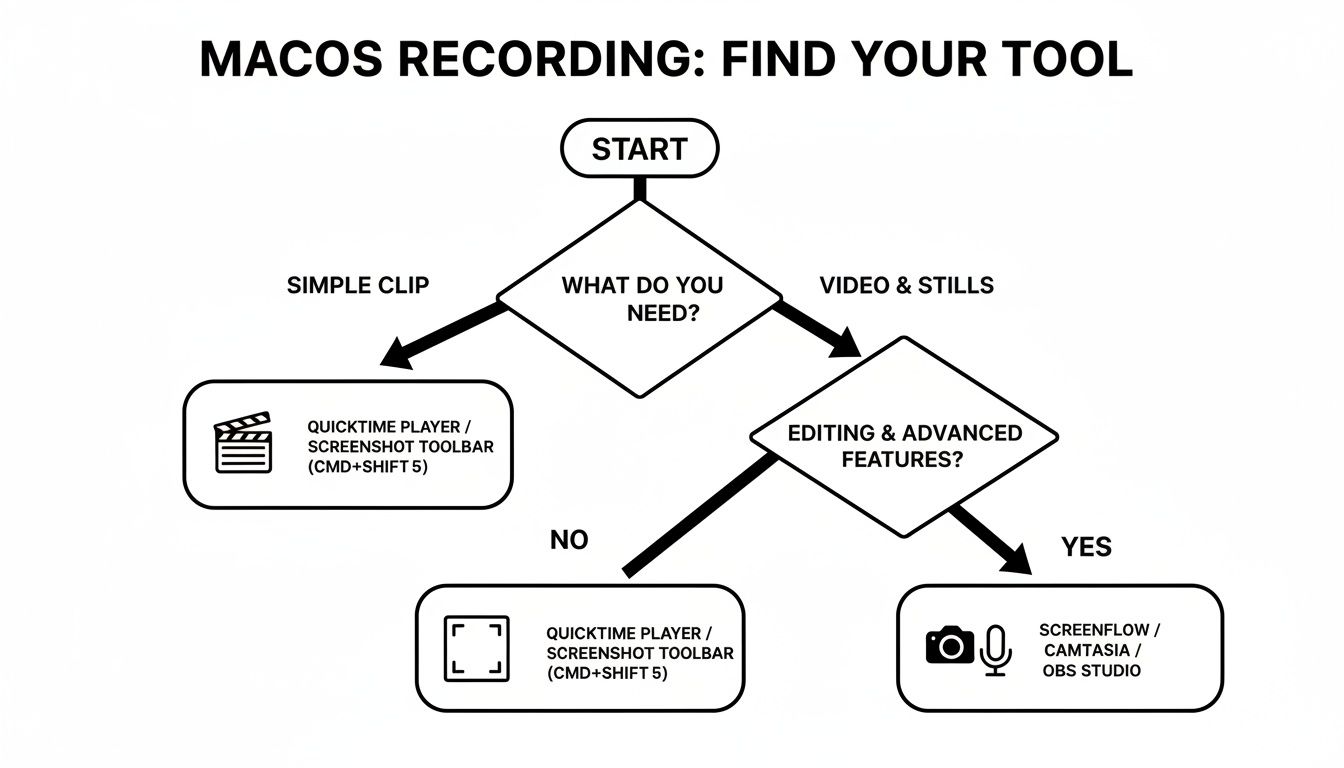
As you can see, the first step is always figuring out if you're just capturing a quick action or producing a more comprehensive piece of content.
Subscription vs. One-Time Purchase
Pricing is a big fork in the road. Subscription software keeps you up-to-date with the latest features but hits your bank account every month or year. On the other hand, a one-time purchase is a straightforward, upfront investment.
This table breaks down how the different options stack up.
Feature Comparison of macOS Screen Recorders
This table compares key features across different types of macOS screen recorders to help you choose the right tool for your project.
| Feature | Built-in Tools (QuickTime/Screenshot) | Subscription Software | Screen Charm (One-Time Purchase) |
|---|---|---|---|
| Watermark-Free | Yes | Yes (on paid tiers) | Yes |
| Webcam Recording | Yes (QuickTime) | Yes, often with advanced controls | Yes, with size and shape options |
| Advanced Editing | No (basic trimming only) | Yes, extensive features | Yes, including auto-zoom and trimming |
| Cursor Effects | No | Yes, highlighting and clicks | Yes, including auto-following zoom |
| Export Quality | Up to screen resolution | Often up to 4K | Up to 4K |
| Cost | Free | Recurring monthly/annual fee | Single, one-time payment |
For many creators, the one-time purchase model hits a sweet spot. You get the professional features that free tools lack without getting locked into long-term payments.
An app like Screen Charm was built on this idea, giving you an intuitive workflow and powerful features like auto-zoom for a single price. It strikes a great balance, giving you everything needed for high-quality, watermark-free videos.
Finding the right tool isn't about getting the most features; it's about getting the right features for your specific workflow. A tool that saves you time during editing is often more valuable than one with a hundred options you'll never use.
Ultimately, choosing the right screen recorder with no watermark for your Mac comes down to being clear about your goals. Once you know what you need to accomplish, you'll easily find a tool that helps you get there.
Creating Your Watermark-Free Video With Screen Charm
Alright, let's move from theory to practice. It’s one thing to talk about avoiding watermarks; it’s another to actually create a professional, engaging recording that’s ready to share. This guide will walk you through the entire process using Screen Charm, a slick tool designed specifically for macOS. We'll go from initial setup all the way to exporting a polished 4K video.
The goal isn't just to capture what's on your screen. It's to produce a high-quality asset that looks sharp and professional, without getting bogged down by a complicated video editor.
Nail the Initial Setup for a Professional Look
First impressions count, even with screen recordings. Before you ever hit that red button, spending a couple of minutes on your setup can make a world of difference in the final quality. This really comes down to choosing your background and positioning your webcam.
Screen Charm makes this incredibly easy by letting you add custom backgrounds. Instead of showing off a messy office or a distracting room, you can upload a branded image or just a clean, simple color. It’s a small touch, but it immediately adds a layer of professionalism and keeps the viewer’s focus where it belongs: on your content.
You can also tweak your webcam overlay in just a few clicks:
- Shape: Go with a classic circle or a more traditional rectangle for your picture-in-picture frame.
- Size and Position: Simply drag and resize your webcam feed. I usually stick it in a corner where it won’t cover up any important on-screen info.
Taking a minute to get these settings right elevates your video from a simple screen capture to a branded, professional tutorial. It’s a simple step that signals quality to your audience right from the get-go.
This screenshot gives you a sense of the clean, intuitive interface where you can manage your webcam and background before you start.
The whole point of the design is to be straightforward, letting you focus on creating great content instead of fighting with confusing menus.
Recording with Dynamic Auto-Zoom
Once your setup looks good, the real fun begins. From my own experience, one of the most tedious parts of creating tutorials is manually zooming in on key details to guide the viewer's eye. Screen Charm completely automates this with its auto-zoom feature.
As you record, the software intelligently follows your cursor, smoothly zooming in on buttons, menus, and text as you click around. This creates a really dynamic, easy-to-follow video without you having to do any of that tedious post-production editing. If you create product demos or software walkthroughs, this one feature is an absolute game-changer.
It feels natural, mimicking how a viewer's eye would follow your actions and making the whole experience clearer and more engaging. You can see how this and other features work over on the official Screen Charm website.
Post-Production and Exporting in 4K
Let's be honest, nobody nails a recording perfectly on the first try. After you finish, you’ll probably want to make a few tweaks. The good news is that Screen Charm includes a built-in editor, so you don't have to jump over to another application.
Here’s what you can do right inside the app:
- Trim Your Clip: Easily snip out any awkward pauses at the start or end of your recording.
- Fine-Tune Zoom Effects: If the auto-zoom wasn’t quite perfect, you can jump in and manually adjust the zoom points and timing to get it just right.
- Adjust Properties: You have control over other elements to make sure the final video looks exactly the way you envisioned.
When you're happy with the final cut, the last step is exporting. With Screen Charm, you can export your entire project in crisp 4K resolution. The final video file is completely clean—no logos, no branding, and absolutely no watermarks. You get a high-quality video ready to upload to YouTube, embed in an online course, or send straight to a client.
Pro Tips For Polished Screen Recordings
Getting rid of that distracting logo is a fantastic start, but a truly professional-looking screen recording is about more than just using screen recorders no watermark. It’s the small details that elevate your video from just "good enough" to genuinely impressive.
Lots of people get hung up on video resolution but forget about audio entirely. Let me tell you, nothing makes a crisp 4K video feel amateurish faster than terrible sound. Your Mac's built-in mic might be okay for a quick family video call, but for a tutorial or product demo, it’s going to pick up every keyboard tap and echo in the room.
Invest In Clear Audio
If you're going to upgrade one thing, make it your microphone. Seriously. A decent external USB mic can make a night-and-day difference in how clear your voice sounds. You don’t need to spend a fortune on a studio-grade setup; many affordable mics will give you that professional, broadcast-quality sound.
Clear, professional-sounding audio builds subconscious trust with your audience. When your voice is easy to listen to, viewers are more likely to stay engaged with your content from start to finish.
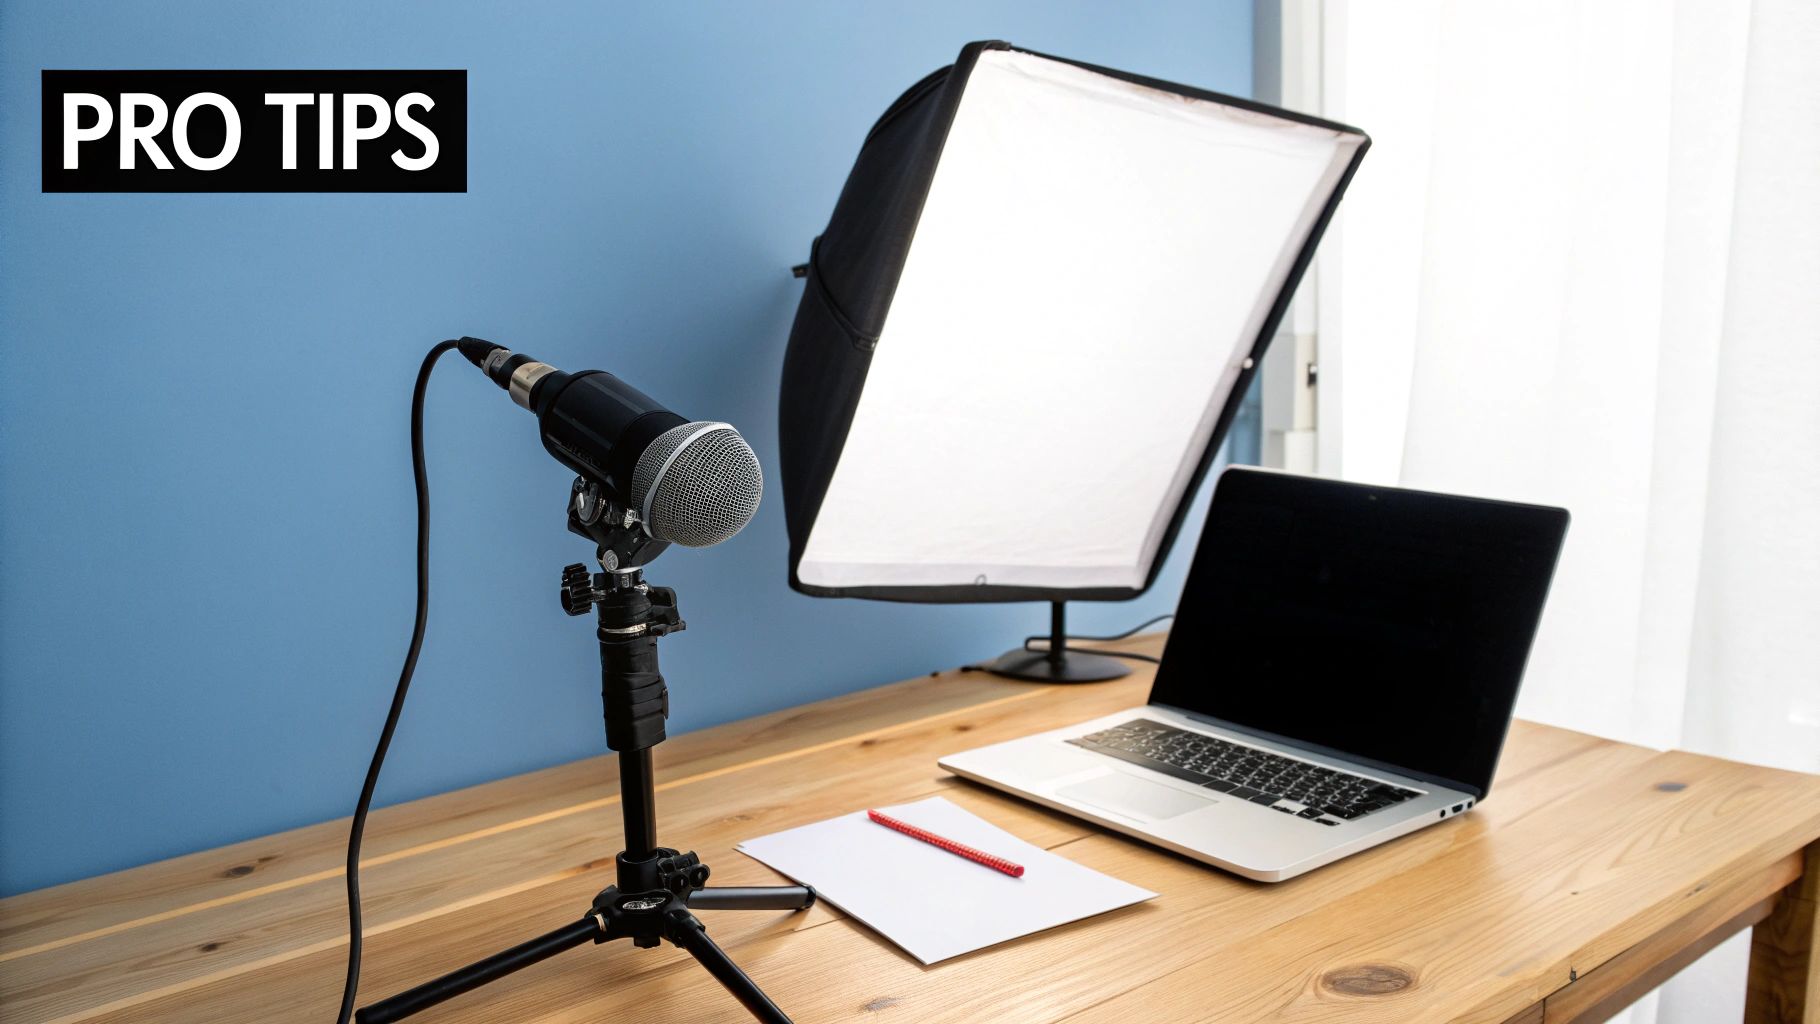
Simple Lighting Makes A Big Difference
Alright, let's talk about how you look on camera. You don't need a fancy lighting rig to avoid looking like you're broadcasting from a cave. The number one rule is simple: have your main light source in front of you, never behind you.
An easy trick is to just face a window and let natural daylight do the work. Recording at night? Try placing a small lamp behind your laptop, aimed at a wall. The reflected light creates a soft, flattering glow that gets rid of harsh shadows and that grainy webcam look.
Plan Your Content Before Recording
Here’s a lesson I learned the hard way: winging it is a huge time-waster. Hitting record without a plan almost always leads to rambling, forgetting key steps, and spending hours in the editing chair fixing it all.
Before you even open your screen recorder, jot down a simple outline or a script. Think of it as a roadmap for your video. This keeps you focused and ensures your tutorial flows logically, which is a lifesaver when you're demonstrating something complex. A little planning upfront saves a ton of editing time later.
Want to take it a step further? Dive into our full guide on how to improve video quality for some more advanced techniques.
Optimize Your Video Files For Sharing
Last but not least, think about where your video is going to live. Sure, exporting in the highest possible quality sounds great, but massive 4K files can be a nightmare to upload or for your viewers to stream.
When you're ready to export, look at the compression settings. Most modern screen recorders no watermark have built-in presets for platforms like YouTube, which are designed to find the perfect balance between quality and file size. Using a common codec like H.264 is usually a safe bet, ensuring your video looks great everywhere without taking ages to load.
Still Have Questions? Let’s Clear Things Up
Diving into screen recording can feel a bit overwhelming, especially when you just want a clean, professional-looking video without a distracting logo plastered on top. Let's tackle some of the most common questions Mac users have when they're on the hunt for the right tool.
Are Free Mac Screen Recorders Really Watermark-Free?
Some are, but there's almost always a catch. Your Mac already has QuickTime Player and the Screenshot utility built right in. They are 100% free and will never add a watermark, which is fantastic for quick, no-fuss recordings.
The problem is, they're pretty bare-bones. You won't get features like an integrated editor, the ability to overlay your webcam, or dynamic zoom effects. Most other third-party tools that advertise themselves as "free" will corner you by adding a watermark, capping your recording time, or locking their best features behind a subscription. They're fine for a quick test, but not for serious work.
I Already Recorded a Video. Can I Just Remove the Watermark?
Technically, yes, but you really shouldn't. You'll find apps and online tools that promise to scrub watermarks away, but the final product almost always looks sloppy. These methods usually involve blurring the logo, awkwardly cropping your video, or using an AI tool that leaves weird artifacts behind.
Even worse, trying to remove a watermark often goes against the software's terms of service. Your best bet, and the most professional approach, is to simply start with a screen recorder that doesn't use watermarks in the first place. You'll get a crisp, high-quality video from the get-go.
The only truly effective way to handle watermarks is to avoid them from the start. Choosing the right tool saves you from messy workarounds that can tank your video quality and hurt your credibility.
Why Pay for an App When Free Ones Exist?
It really comes down to valuing your time and the final quality of your work. A free tool can get a basic job done, but a dedicated, paid app is purpose-built to help you create polished, professional-grade videos without the headache.
You're investing in a much smoother workflow. Think about features you just won't find in the free options:
- Automatic Cursor Zoom: It guides your audience's focus for you, saving you tons of manual editing time.
- Custom Webcam Backgrounds: Lets you create a branded, clean look instead of showing off your messy office.
- Built-in Editing Suite: You can trim, cut, and polish your video all in one place, without needing to export to another program.
A one-time purchase app like Screen Charm hits that sweet spot. You get powerful, professional features without being locked into an expensive monthly subscription, making it a smart investment for anyone who regularly creates screen recordings.
Ready to create stunning, watermark-free videos on your Mac without the hassle? Screen Charm gives you powerful features like auto-zoom and an integrated editor for a single, one-time price. Get Screen Charm today and elevate your screen recordings.