How to Master Screen Recording with Internal Audio on a Mac
Ever tried to screen record with internal audio on your Mac and felt like you were hitting a brick wall? You’re not alone. The short answer for why this is so tricky comes down to one word: security. Apple intentionally designs macOS to keep applications from easily grabbing your system audio, all in the name of protecting your privacy.
Why Capturing Your Mac's System Audio Is So Complicated
If you've spent time recording what you thought was the perfect software tutorial, only to play it back in complete silence, you’ve run smack into the macOS audio wall. This isn't a bug; it's a feature. Apple sandboxes applications, which basically means it puts them in their own little digital playpens, isolated from each other. This is great for preventing one app from snooping on another, but it also stops them from listening in on each other's audio streams.
This security-first approach is fantastic when you're on a sensitive video call, but it's a massive headache for content creators. Your microphone is a simple input device you can grant access to with a click. Your Mac’s system sound, on the other hand, is an output. There's just no built-in "on" switch that lets your recording software listen in.
The Core Challenge for Creators
This design forces anyone who needs system audio into finding workarounds that can feel incredibly technical. You might just want to record a quick product demo with its UI sounds, save a clip from a webinar, or document a process that has important audio cues. Without a direct path, you're left hunting for a solution.
Here are the most common hurdles you'll run into:
- No Native Support: The tools Apple gives you—QuickTime Player and the Screenshot toolbar (Cmd+Shift+5)—are great for screen and microphone recording, but they can't capture the sounds coming from your Mac.
- Complex Workarounds: The most common solutions involve installing third-party virtual audio drivers. These clever tools reroute your Mac’s audio output so it shows up as an input device, but they're not exactly plug-and-play.
- Configuration Headaches: Getting these virtual drivers to work often means a trip to the Audio MIDI Setup utility, where you have to create custom device configurations. For anyone who isn't an audio engineer, this can be downright confusing.
The demand for a simple way to do this is exploding. The need for clear, effective digital communication has pushed the global screen recording software market to a valuation of around USD 1.2 billion in 2023.
This isn't just a niche problem anymore. More people than ever are creating video content for remote work, online courses, and marketing. Projections show the market could grow to between USD 1.7 billion and USD 2.8 billion by 2032, all driven by people looking for tools that make complex tasks—like capturing system audio—simple. You can dive deeper into these trends in this detailed market analysis.
Understanding this core challenge is the first step. Now, let’s get into the practical solutions—from pushing the native tools to their limits, to mastering virtual drivers, and finally, looking at a simple app that makes screen recording with internal audio completely effortless.
Your Mac’s Built-In Recording Tools: A Good Start, But…
Your Mac actually comes with two really handy, free tools for screen recording: QuickTime Player and the Screenshot Toolbar (just hit Cmd+Shift+5 to bring it up). They’re fantastic for quick and dirty captures, like when you just need to record your screen and maybe talk over it with your microphone.
But here’s the catch, and it’s a big one. Straight out of the box, neither of these tools can record your Mac's internal audio—the sound coming from your apps, browser, or games. This is a classic stumbling block. You think you’re recording a perfect software demo with all its sound effects, only to play it back and hear… nothing. It’s a common frustration, but knowing this limitation upfront helps you decide if these tools are the right fit for your project.
The Screenshot Toolbar: Simple and Fast
For a no-fuss screen capture, the Screenshot Toolbar is your best friend. Pressing Cmd+Shift+5 pops up a little control panel at the bottom of your screen. From there, you can choose to record your entire screen, a specific window, or just a portion you drag and select. It’s about as intuitive as it gets for visual recording.
But take a look at the options panel, and you’ll see the problem right away.
See that? The only audio inputs are microphones—your MacBook’s built-in mic or any external one you’ve plugged in. There’s no simple checkbox for "System Audio." This is the core reason why screen recording with internal audio on a Mac isn't as straightforward as it should be.
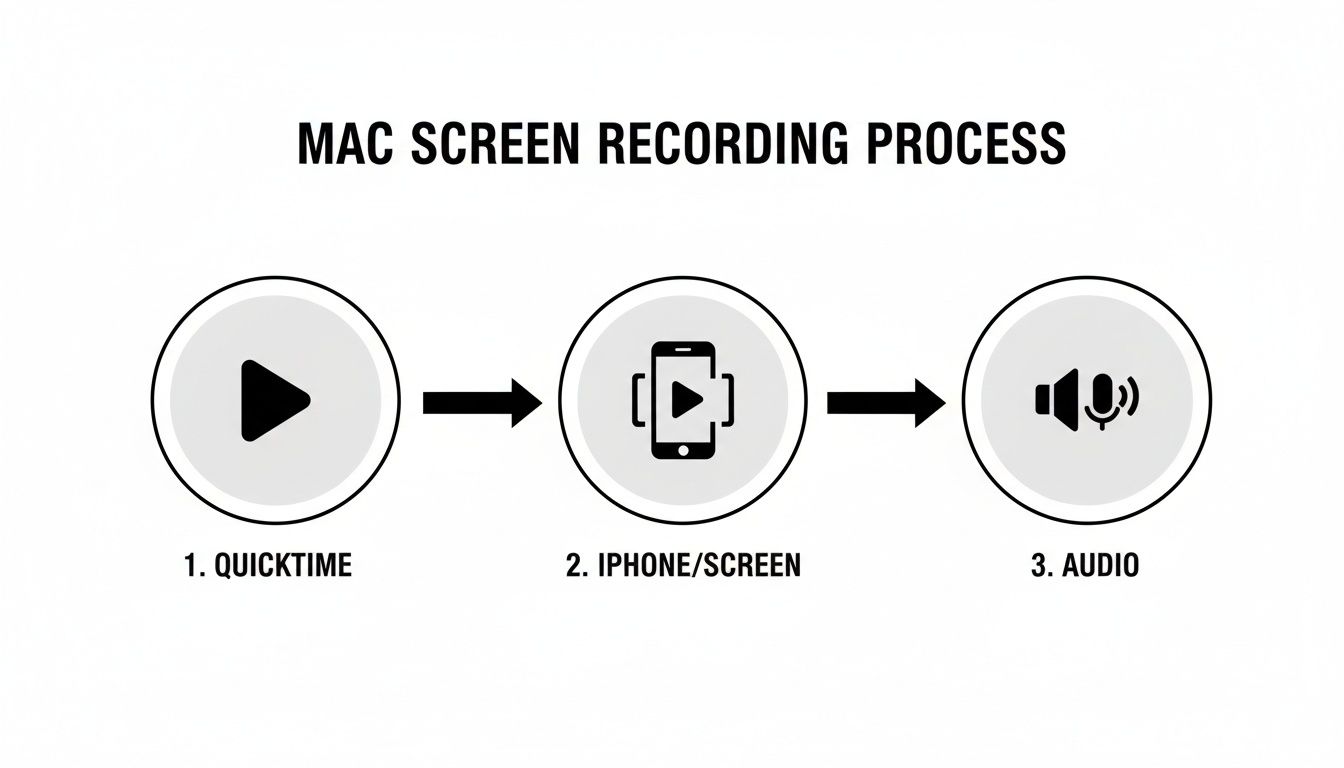
The Quirky iPhone Workaround with QuickTime Player
QuickTime Player gives you a bit more control, but it suffers from the same audio limitation. However, there’s a strange little workaround that not many people know about, and it involves another Apple device. I’ve used this in a pinch, and while it feels like a hack, it can get the job done if you have the right gear handy.
Basically, you trick your Mac into thinking your iPhone is a microphone. You’ll need to connect your iPhone or iPad to your Mac with a Lightning or USB-C cable.
Here's how it works:
- Plug your iPhone into your Mac.
- Open QuickTime Player and go to File > New Movie Recording.
- Click the little arrow next to the record button. Select your iPhone as both the camera and the microphone.
- Now, start a New Screen Recording (File > New Screen Recording).
- In the screen recording options, pick your iPhone as the microphone source.
This weird setup routes audio through your connected device. So, any sound playing from your iPhone will get picked up in your Mac’s screen recording. It’s a clever, if clunky, solution that just goes to show how determined people are to get around Apple's audio recording hurdles.
This method turns your iPhone into a makeshift external audio source for your Mac. It’s a testament to user ingenuity in the face of a frustrating software limitation.
This very challenge has fueled a huge market for better screen recording tools. North America leads the pack, with tons of creators and businesses needing powerful tools for e-learning and training. Europe isn't far behind, often driven by compliance needs in finance or customer service where recording interactions is mandatory. If you're curious about the industry trends, this comprehensive market report dives deep into the global demand for more powerful and user-friendly recording software.
When the Built-In Tools Just Don't Cut It
While the iPhone trick is a neat party trick, it's far from a reliable solution. Relying on an external device introduces a bunch of new problems that can mess up your final recording.
Drawbacks of the QuickTime Workaround
- Audio Lag: Routing audio from one device to another is asking for trouble. You’ll often get a noticeable delay, leaving your audio and video out of sync.
- Extra Hardware Needed: You have to have an iPhone or iPad and the right cable on you. It's not great for spontaneous recordings.
- Lower Audio Quality: The sound quality often gets crunched down to mono and just doesn't sound as crisp as the original.
- A Pain to Set Up: Honestly, who wants to juggle two devices and fiddle with multiple settings every time they need to record something? It's not a sustainable workflow.
At the end of the day, your Mac's built-in tools are perfect for silent screen recordings or simple voiceovers. But if you need to capture clean, perfectly synced system audio, you'll have to look past these native options. The next step is to explore dedicated solutions built to solve this exact problem.
The Power User Method: Using a Virtual Audio Driver
So, when your Mac's built-in tools just don't cut it, it's time to bring in a specialist. For reliable screen recording with internal audio, the go-to solution for most creators is a virtual audio driver. The best way to think of it is as a digital patch cable—it reroutes your Mac's sound output and cleverly turns it into an input that your recording software can actually listen to.
The most popular and dependable driver out there is BlackHole, a free, open-source tool from Existential Audio. It’s a powerful workaround that completely solves Apple’s audio capture limitations, and it doesn't cost a dime. The setup might look a little technical at first, but once you get the logic, it becomes a simple, repeatable process for any recording you need to do.
How Does This Virtual Driver Trick Work?
Before we jump into the setup, it helps to understand what’s actually happening behind the scenes. Normally, when you play a video, the sound flows directly from the app to your speakers. Your Mac sees this as a one-way street—an output—and for security reasons, it blocks other apps from eavesdropping.
A virtual driver like BlackHole creates a new, invisible audio device on your Mac. You can then tell your system to send all its sound to this new "BlackHole" device instead of your speakers. At the same time, you tell your screen recording software (like QuickTime or OBS) to listen for audio coming from the BlackHole device. It’s a really clever bit of audio redirection.
This diagram helps visualize how all the pieces—the screen content, the audio, and the recording software—come together.
As you can see, capturing what's on your screen and what you're hearing are two separate streams that need to be combined into one final recording.
Getting BlackHole Installed
First things first, let's get BlackHole onto your Mac. The installation itself is straightforward, but macOS security can be a bit overprotective, so you might need to give it a nudge.
- Download the installer: Head over to the official Existential Audio website to grab the latest version of BlackHole. You'll just need to pop in your email, and they'll send you the download link.
- Run the installer: Open the
.pkgfile you downloaded and follow the on-screen prompts. It’s a standard Mac installation you’ve probably done a hundred times. - Approve the security prompt: This part is critical. Modern macOS versions will almost certainly ask you to approve the installation. You’ll have to go to System Settings > Privacy & Security and click "Allow" next to the message about Existential Audio. If you skip this, BlackHole simply won't work.
Once it's installed, don't look for an app icon in your Dock. BlackHole is a background driver, so you’ll manage it using a built-in Mac utility.
Configuring Your Mac's Audio
This is where the real magic happens. We’ll use a little-known app called Audio MIDI Setup to create a special device that lets you both hear your audio and record it at the same time. If you just sent your system sound directly to BlackHole, you wouldn't be able to hear anything—a huge problem if you're trying to record a presentation or gameplay.
To fix this, we'll create what's called a Multi-Output Device. This handy tool bundles multiple audio outputs—in this case, your real speakers and the virtual BlackHole driver—into one single source.
Here’s how to set it up:
- Open the Audio MIDI Setup app. The easiest way is to use Spotlight (Cmd + Space) and just start typing its name. It's in your
Applications > Utilitiesfolder, too. - Click the "+" button in the bottom-left corner and choose Create Multi-Output Device.
- A new panel will appear. Check the boxes for your main audio output (like MacBook Pro Speakers or your headphones) and for BlackHole.
- This is important: Make sure your primary speakers or headphones are at the top of the list and that the Drift Correction box next to it is checked. This keeps the two audio streams from falling out of sync over time.
- Finally, right-click on your new Multi-Output Device in the left sidebar and select Use This Device For Sound Output.
Now, your Mac is sending all system audio to both your speakers and BlackHole simultaneously. You can hear everything perfectly, and BlackHole is ready to pass that same audio along to your recording app. If you want to dive deeper into this, our blog has other guides on recording system audio on a Mac.
Time to Record
With all the setup out of the way, you're ready to hit record. The very last step is just telling your recording software, whether it's QuickTime Player or OBS Studio, to use BlackHole as its microphone.
When you start a new screen recording in QuickTime, just click the "Options" menu. In the microphone section, you'll now see BlackHole as an option. Select it, and you're good to go. You'll finally be capturing that clean, internal audio.
This whole process—installing a driver, creating a multi-output device, and selecting it as an input—is the classic manual method for high-quality screen recording with internal audio on a Mac. It’s a powerful technique that gives you complete control.
While BlackHole is the current gold standard, some long-time Mac users might remember its predecessor, Soundflower. Here's a quick look at why BlackHole is the clear winner today.
Comparing Virtual Audio Drivers For macOS
This table offers a quick comparison of BlackHole and the older Soundflower to help you decide which is the right fit for your needs.
| Feature | BlackHole | Soundflower |
|---|---|---|
| Developer | Existential Audio | Cycling '74 (Original) |
| Active Support | Yes, regularly updated for new macOS versions. | No, development has largely stopped. |
| Compatibility | Optimized for modern macOS, including Apple Silicon. | Can have major issues on newer systems. |
| Installation | Signed installer, but requires security approval. | Often very difficult to install on recent macOS versions. |
Ultimately, BlackHole is a fantastic, free solution. It takes a few minutes to configure the first time, but it’s an incredibly reliable way to get around macOS's limitations and produce professional-sounding recordings. For any serious Mac-based creator, it's a skill well worth learning.
The Easiest Method: One-Click Audio Capture with Screen Charm
After wrestling with virtual audio drivers and piecing together workarounds with macOS's built-in tools, you know the manual methods can be a real headache. For anyone trying to be productive—a developer making a product demo, a marketer recording a webinar—every minute spent tweaking audio settings is a minute you're not creating. This is exactly where a purpose-built application completely changes the game.
Instead of a drawn-out, multi-step setup, imagine just opening an app, flicking a switch for "System Audio," and hitting record. That’s the whole idea: to eliminate the technical hurdles and let you get straight to work.
From Complicated to Effortless
For most people, moving from a manual setup to a dedicated tool like Screen Charm is a huge relief. All the problems we've talked about—installing virtual drivers, configuring a Multi-Output Device, and worrying about audio sync—are solved right out of the box. You shouldn't have to be an audio engineer just to get a clean recording.
This approach is all about efficiency. It’s for the software creator who needs to quickly document a bug with clear audio cues, or the teacher who wants to make a tutorial without getting lost in a sea of settings. The focus finally shifts from how you’re recording to what you’re trying to say.
The real value of a streamlined tool isn't just saving time; it's about removing the friction that kills creativity. When the tech just works, you can focus on delivering a clear, compelling message.
This kind of simplification is becoming essential as video becomes the go-to medium for everything from training to marketing. The demand for screen recorders that are actually easy to use is exploding. Some forecasts show the market growing at a CAGR of over 13%, potentially hitting more than USD 18 billion by 2029. This isn't just a trend; it's a clear signal that people need powerful tools that don't require a technical manual to operate.
More Than Just Audio Capture
Getting the internal audio right is a huge first step, but a truly great video does more. It guides the viewer’s eye, looks professional, and brings all the necessary elements together without feeling clunky.
This is where an all-in-one solution really shines:
- Seamless Webcam Integration: Need to add a personal touch? You can easily add a "talking head" overlay to your recording. Position your webcam, pick a background, and connect with your audience face-to-face.
- Dynamic Cursor Effects: A standard pointer can get lost on a busy screen. With highlights and click effects, you can draw attention exactly where you need it, which is a lifesaver for software tutorials.
- Automatic Zoom and Pan: Some of the best tools can automatically follow your cursor, zooming in on the action to keep viewers locked in. This one feature can transform a static, boring recording into a dynamic and engaging presentation.
These features all work together to solve the real-world challenges of making high-quality screen recordings on a Mac. For instance, a developer can record a new feature, using auto-zoom to highlight specific UI elements while the system audio captures every click and notification perfectly. The final video isn’t just a raw recording; it’s a polished, professional demo.
The Value of an Integrated Workflow
At the end of the day, the easiest method is the one that respects your time. An integrated app like Screen Charm stops you from having to juggle multiple tools—one for the screen, another for the audio, and maybe a third for editing. Everything you need, from capturing your screen and audio to adding a webcam overlay, happens in one place.
By flattening the learning curve, this approach empowers anyone, not just video pros, to create content that looks and sounds fantastic. It gives you a direct path from an idea to a finished, high-quality video, making screen recording with internal audio a simple, one-click process.
Polishing Your Screen Recordings: From Good to Great
Getting the hang of screen recording with internal audio is a huge win. But once you’ve got the technical side down, a few simple tweaks can take your videos from just a screen capture to something that looks and feels truly professional.
Think of your screen as a movie set. Before you call "action," you need to prep the scene. Clear away any desktop clutter, close any apps you aren't using, and maybe switch to a clean, simple wallpaper. This helps your audience focus on what you’re showing them, not the 57 files you have saved to your desktop.
Another pro move? Silence your notifications. Nothing kills the flow of a great take like a random email alert or a Slack message popping up on screen. A quick flip of your Mac’s "Do Not Disturb" switch is all it takes to keep your recording clean.
Your Audio Can Make or Break a Video
Let’s be honest: people will put up with slightly grainy video, but they will click away instantly if the audio is terrible. Distorted, muffled, or quiet sound is a deal-breaker, so getting your levels right is absolutely critical.
Before you launch into your main recording, do a quick soundcheck. Talk into your mic at a normal speaking volume and watch the audio meter. You're aiming for the meter to bounce around in the green and yellow area. If it's constantly hitting the red, your sound is "clipping," and it's going to be harsh and distorted. Pull the input volume down a bit.
And while the built-in mics on modern Macs are decent, an external USB microphone is one of the single best upgrades you can make. It will make your voice sound richer and clearer, lending an immediate sense of authority to your videos.
Have a Plan, Even a Simple One
Trying to "wing it" on a screen recording rarely works out well. You don't need a perfectly polished script, but a basic outline is your best friend for staying on topic and avoiding awkward pauses.
Jot down a few bullet points of the key things you need to cover. This little bit of structure goes a long way in making sure you don't miss a step and helps your video flow logically. For anything more complex, a full script might actually save you time in the long run.
A clear plan is a sign of respect for your viewer's time. It helps you cut out the fluff, eliminate "ums" and "ahs," and deliver a tight, engaging video that gets right to the point.
Recording is just one piece of the puzzle. As you get more serious, you'll find that a whole ecosystem of software can support your workflow. If you're ready to level up, check out some of the best tools for content creators that can help with editing, graphics, and more.
Direct Your Audience's Attention
In a screen recording, your cursor is the main character. It's what people follow to understand what you're doing, so you need to make it easy for them to see.
Most good screen recording apps offer a few ways to make your cursor pop. Look for settings like:
- Highlighting: This puts a colored circle around your cursor so it's impossible to lose.
- Click Effects: A little ripple or flash when you click gives viewers a clear visual cue that you've taken an action.
- Magnification: Some tools can zoom in on the area around your cursor, which is fantastic for pointing out tiny buttons or menu items.
These visual assists make a massive difference in how easy your recording is to follow. Once you've captured everything, the next step is editing. If you're new to that, our guide on video editing tips for beginners is a great place to start. And don't forget to record in a standard resolution like 1920x1080 (1080p) to ensure everything looks crisp and clear for your audience.
Got Questions? We've Got Answers
Even with the best instructions, you're bound to have a few questions when you first start recording your Mac's screen with internal audio. Let's tackle some of the most common ones I hear from people.
Can I Record My Mac's Audio and My Voice at the Same Time?
Absolutely. The "how" really depends on the tool you're using.
If you've gone the route of a virtual audio driver like BlackHole, you'll need a one-time setup in your Mac's Audio MIDI Setup utility. The trick is to create an "Aggregate Device," which is just a fancy way of telling your Mac to bundle two audio sources—in this case, BlackHole and your microphone—into a single input. Once you do that, your recording software can grab both at once. It's a bit technical, but it works like a charm.
Then there are apps like Screen Charm, which are built to handle this exact problem right out of the box. You just select your system audio from one menu and your microphone from another. No complex routing or setup needed.
Why Is Recording System Audio on a Mac So Complicated?
This is a classic Mac head-scratcher. The short answer? Apple is intensely focused on security and privacy.
By default, macOS "sandboxes" applications, which keeps them from listening in on each other. Think about it: this is a huge security win. It prevents malicious software from, say, recording a private FaceTime call or audio from your banking website.
The downside, of course, is that it makes legitimate tasks like screen recording a lot harder. It’s a deliberate trade-off Apple made, choosing to prioritize system-wide security for everyone, even if it means content creators have to jump through a few extra hoops.
This security-first philosophy is a core part of what makes macOS what it is. The methods we’ve covered are simply smart ways to work within those robust protections for legitimate projects.
Will Using a Virtual Audio Driver Slow Down My Computer?
It's highly unlikely. For any reasonably modern Mac, a lightweight driver like BlackHole or Soundflower barely makes a dent in performance.
The real culprit behind a sluggish recording is almost always the video encoding. Capturing and compressing high-resolution video in real-time is a very demanding task for your computer's processor. If you see your Mac chugging along or hear the fans kick into high gear, it's the video capture process, not the simple act of rerouting audio.
Is It Actually Legal to Screen Record Content with Audio?
This is a big one, and the answer comes down to one thing: what are you recording?
You are completely in the clear if you're recording your own original content. Think things like:
- A tutorial you’re creating for your software.
- A demo of a website you designed.
- A walkthrough of your personal gaming session.
Where you run into trouble is recording copyrighted material without permission. This includes movies from Netflix, songs from Spotify, or paid online courses. Doing that is a violation of copyright law. Always be sure you have the rights to record and share whatever you're capturing. This guide is all about helping you create your own great content, not someone else's.
Ready to ditch the technical workarounds and get straight to creating? Screen Charm offers one-click system audio capture, dynamic cursor effects, and easy webcam integration in a single, intuitive app. Grab your copy and start recording professionally today at https://screencharm.com.