How to Record Internal Audio on Mac: A Complete Guide
If you've ever tried to record internal audio on a Mac, you've probably hit a wall. It seems like it should be simple, but macOS doesn't give you a built-in option to just "record system sound." The secret lies in using a virtual audio driver—a clever piece of software that acts as a middleman. My go-to free tool for this is BlackHole.
Why Is Recording Mac System Audio So Complicated?
Ever fired up QuickTime to record your screen, only to find it captured your voice from the microphone instead of the audio from your video? That’s not a bug. It's actually a deliberate design choice by Apple.
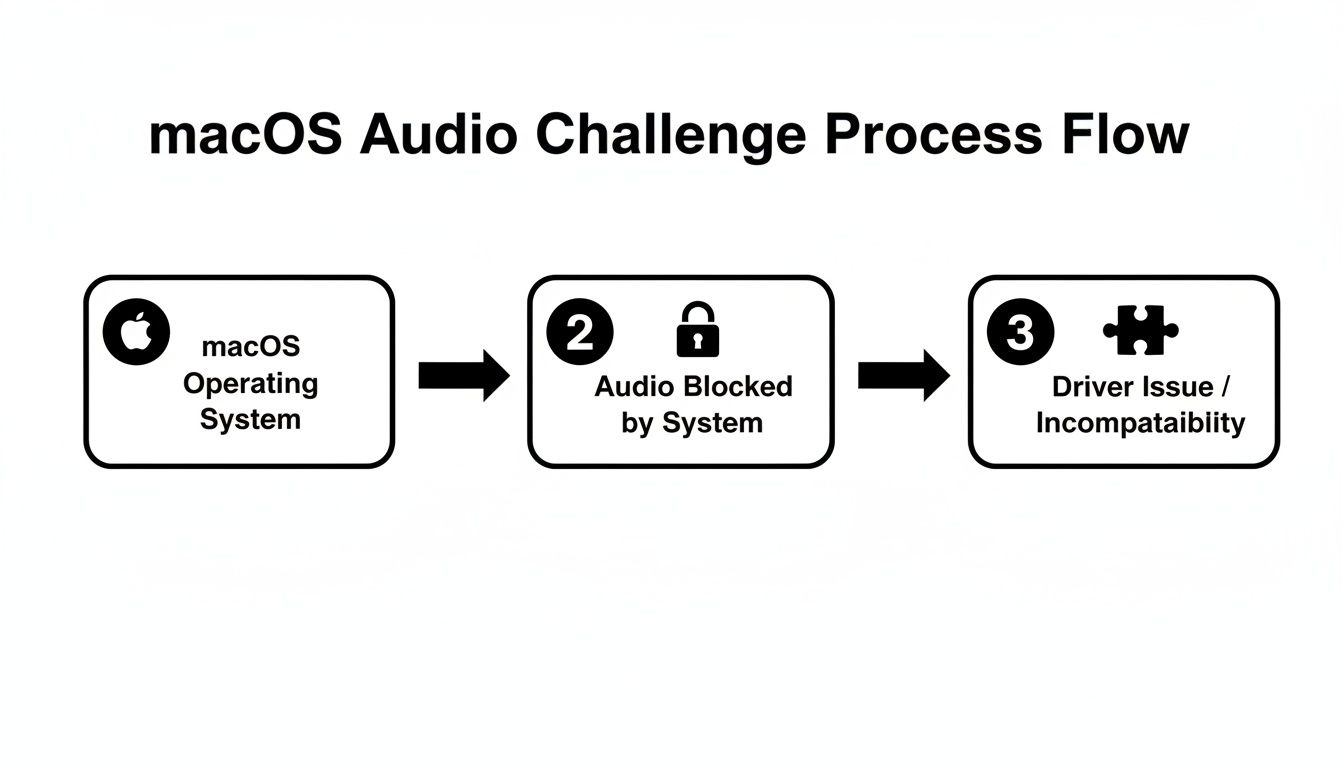
For years, macOS has intentionally blocked the direct recording of system audio, and it really comes down to privacy and copyright. If any app could just grab your system's sound output, it could accidentally (or maliciously) record sensitive notification chimes, private calls, or copyrighted music and movie soundtracks. To prevent this, Apple basically built a digital wall between your Mac's speaker output and any recording input.
The Rise of Virtual Audio Drivers
To get around this, we use a smart workaround: virtual audio drivers.
Think of these tools as digital patch cables. They create a new, virtual audio device on your Mac. This device "listens" to your system's sound output and then reroutes it as an input source that recording software can finally see and use.
This has been the standard method for a long time on macOS. Apple's long-standing decision not to offer a native recording option pushed the community to create solutions like Soundflower (which first appeared around 2004) and, more recently, BlackHole (which went public in 2019). BlackHole has become the modern standard for free loopback drivers—its GitHub page shows tens of thousands of downloads, a testament to how many creators rely on it.
The core challenge isn't that your Mac can't record its own audio—it's that it won't let you do it without a middleman. Understanding this helps explain why setting up a solution involves a few extra steps.
What This Means For You
Knowing this backstory is helpful because it clarifies why the solutions work the way they do on a Mac. Whether you're using a free tool like BlackHole or a paid one, the goal is always the same: to bridge that gap Apple put in place.
The process usually breaks down into three key parts:
- Installing a driver: This adds the virtual device that will handle the audio routing within macOS.
- Configuring your Mac's settings: You'll need to tell your Mac to send system sounds to this new device.
- Selecting the right input: In your recording app, you'll choose the virtual device as your audio source.
Getting a handle on how screen recording and audio capture work together is the first step. If you want to dive deeper into the basics, our guide on whether screen recording captures audio by default is a great place to start. While macOS makes things a bit technical, the good news is that getting a high-quality internal audio recording is completely doable once you have the right setup.
If you're looking to record your Mac's system audio without opening your wallet, you're in luck. The most popular and reliable free method involves a clever combination of a virtual audio driver called BlackHole and the QuickTime Player app that's already on your Mac.
Think of BlackHole as a virtual audio cable for your Mac. It intercepts the sound that would normally just go to your speakers and reroutes it as an input source that recording apps can actually see and use. Developed by Existential Audio, this open-source tool has become the go-to for Mac users trying to solve this exact problem.
Getting it all working takes a bit of a setup, but it’s a one-time thing. Once you're done, you'll have a rock-solid way to capture system audio whenever you need it.
Installing and Configuring BlackHole
First things first, you’ll need to grab the BlackHole driver from the official Existential Audio website. The installation is just like any other macOS app, but don't expect to see an icon in your Dock—BlackHole runs quietly in the background.
The real magic happens in a utility you might not even know exists: Audio MIDI Setup. The quickest way to find it is with Spotlight (Cmd + Space). This is where you'll tell your Mac how to juggle its regular speakers and this new virtual driver.
The secret sauce here is creating what’s called a "Multi-Output Device." This lets you do two crucial things at once: send audio to BlackHole so it can be recorded, and also send it to your speakers or headphones so you can actually hear what you're recording in real-time.
Creating Your Multi-Output Device
Once you have Audio MIDI Setup open, you’ll create a new device that groups your audio outputs. This is the lynchpin of the whole setup.
Here's a step-by-step guide to get it done:
- Open the Audio MIDI Setup app.
- Click the + button in the bottom-left corner and choose Create Multi-Output Device.
- A new panel will appear. Check the boxes for both your primary speakers (like "MacBook Pro Speakers") and BlackHole.
- This part is critical: Make sure your main speakers are set as the Master Device and check the Drift Correction box for BlackHole. This simple step prevents the audio from slowly drifting out of sync on longer recordings—a real lifesaver.
With your new device created, there's just one last step. Head over to System Settings > Sound, click on the "Output" tab, and select the Multi-Output Device you just made. From now on, your Mac will send all system sounds to both your speakers and the BlackHole driver.
Recording with QuickTime Player
Okay, the hard part is over. Now, recording is surprisingly easy.
Just open QuickTime Player and go to File > New Screen Recording. You'll see the screen recording controls pop up. Click the small "Options" menu, and under the "Microphone" section, you’ll now see BlackHole as an option. Select it.
That’s it! When you hit record, QuickTime will capture your screen and grab the internal audio directly from BlackHole. You’ve successfully worked around Apple’s limitation for free.
The demand for this functionality isn't surprising. Viewership for how-to content grew by over 40% between 2018 and 2023, with software tutorials leading the charge. Even though Apple improved screen recording with the Shift-Cmd-5 shortcut in macOS Mojave (2018), they never included a native way to capture system audio, which is why tools like BlackHole remain essential. You can find plenty of discussions about this on Apple's own forums.
Free vs Paid Internal Audio Solutions on Mac
While BlackHole is a fantastic free option, it's not the only game in town. Paid tools often offer more features and a simpler user experience. Here's a quick comparison to help you decide what's right for your Mac setup.
| Feature | BlackHole (Free) | Loopback (Paid) | Screen Charm (Integrated) |
|---|---|---|---|
| Price | Free (Open-Source) | $99 (One-Time) | Included with the app subscription |
| Ease of Use | Requires manual setup in Audio MIDI Setup. | Extremely intuitive drag-and-drop interface. No manual configuration. | Built directly into the recording workflow. No setup required. |
| Flexibility | Routes all system audio. Limited per-app control. | Granular control. Can route audio from specific apps or combine sources. | Records all system audio automatically during a screen recording. |
| Use Case | Best for general screen recording on a budget. | Ideal for podcasters, streamers, and professionals needing complex routing. | Perfect for users who want an all-in-one solution for tutorials/demos. |
| Technical Skill | Moderate. Comfortable with Mac system settings. | Beginner-friendly. | Beginner-friendly. |
For Mac users who just need to capture system audio for a tutorial, BlackHole is more than capable. But if your workflow is more complex, or you just want a more polished, "it just works" experience, investing in a paid tool like Loopback or using a screen recorder with integrated audio capture like Screen Charm can save you a lot of time and headaches.
Professional Tools for Advanced Audio Routing on Mac
While free solutions like BlackHole get the job done, they often involve a bit of a learning curve and manual setup in Audio MIDI Setup. For anyone who needs more control and a much smoother workflow—like podcasters, streamers, or software demonstrators—it’s worth looking at professional-grade tools designed for macOS.
Premium software turns the often-confusing task of wrangling Mac audio into a simple, visual process. Two apps from the highly respected developer Rogue Amoeba are the gold standard here: Loopback and Audio Hijack. There's a reason they're industry favorites: they're rock-solid, incredibly powerful, and built to solve the exact headaches that come with trying to record audio internally on a Mac.
Instead of just grabbing all your system audio in one big lump, these tools let you be the director, telling every sound exactly where to go.
Loopback: Your Virtual Audio Studio
Loopback's magic lies in its simplicity. It completely replaces the clunky, text-based process of creating aggregate devices with an intuitive, drag-and-drop interface. You can spin up a new virtual audio device in seconds just by visually connecting your sound sources to output channels.
Here’s a real-world scenario on a Mac: you need to record a product demo from a Zoom call but want to kill the constant notification pings from Slack and Mail. With a free tool, that's a tough ask. With Loopback, it’s a piece of cake.
- First, you'd create a new virtual device and give it a name you’ll remember, like "Zoom + Mic."
- Next, just drag the Zoom app icon into the "Sources" column.
- Then, drag your microphone in there as well.
- That’s it. This new "Zoom + Mic" device is now available to any recording app on your Mac.
This is the core strength of Loopback—it gives you surgical precision over your audio. Your recordings come out clean and professional, free of any distracting sounds from other apps.
The image below gives you a feel for Loopback’s interface. You can see how sources like an app and a microphone are visually piped into a single, clean virtual device.
This visual approach takes all the guesswork out of the equation. You can build complex audio routings in moments that would otherwise be a major technical chore on a Mac.
Audio Hijack: The Complete Recording Toolkit
If Loopback is your virtual patch bay for routing audio, then Audio Hijack is the entire recording studio. It doesn’t just route audio; it captures it, enhances it, and saves it for you. For countless Mac creators, Audio Hijack is the definitive tool for grabbing any sound playing on their Mac.
It also uses a visual, block-based system. You simply chain together your sources (like an app), effects (like a noise gate), and outputs (like a recorder).
For example, a podcaster can record their own microphone on one track while simultaneously recording their remote guest's audio from Skype on a separate track. Audio Hijack lets you "hijack" the audio from each source independently, apply live effects, and save everything to a multi-track file for easy editing.
That level of control is a game-changer for post-production. It’s the difference between a messy, single-track recording and a pristine, multi-track project where you can mix and tweak each element perfectly. If you're looking to take your projects even further, understanding how to work with Digital Audio Workstations (DAWs) for podcasts is the next logical step.
Both Loopback and Audio Hijack are paid tools, but for anyone serious about audio quality on their Mac, their reliability and power are worth every penny. They offer that "it just works" experience that saves a ton of time and frustration.
A Simpler Way: Using an All-in-One Mac Tool
Let’s be honest. Setting up virtual drivers or wrestling with pro-level audio routing software works, but it can be a real drag on your creative flow. You suddenly have to become an audio technician, fiddling with settings in multiple apps just to capture the sound from one.
What if you could just skip all that?
This is where an integrated Mac screen recorder like Screen Charm really shines. It's built specifically to solve this problem without forcing you to open System Settings or the Audio MIDI Setup utility. The whole point is to let you focus on creating, not on the technical setup.
Instead of installing a separate driver and building a convoluted Multi-Output device, a tool with built-in audio capture handles everything in the background. It turns a multi-step headache into a single click.
Why Native Integration Is a Game-Changer
The magic of an integrated tool is its sheer simplicity. When the screen recorder itself knows how to grab system audio, the whole process becomes effortless. No extra downloads, no confusing device configurations, and no chance of picking the wrong input.
This is a huge time-saver for anyone making content on a Mac. Picture this: you're recording a tutorial for a new app. You want to be focused on your script and demonstrating the features, not worrying about whether your Mac’s notification dings are bleeding into the final audio.
With an app like Screen Charm, you just:
- Open it up.
- Toggle the "System Audio" switch.
- Press record.
That’s literally it. The software captures crystal-clear audio directly from your Mac’s output, perfectly synced with your screen and camera footage. It completely removes the setup phase, letting you jump straight from an idea to a finished recording in seconds.
The Impact on Demos and Tutorials
High-quality audio isn't just a "nice-to-have" for a product demo or tutorial—it's essential. If your audience can't clearly hear the interface sounds, in-app music, or video clips you're showing, your presentation falls flat. An all-in-one solution ensures you get professional-sounding results every time, no audio engineering degree required.
It also sidesteps the common frustrations that pop up with manual setups. Think about the time you can lose to:
- Driver Headaches: Virtual drivers can break after a macOS update, leaving you scrambling for a fix.
- Forgetting to Switch Back: We've all finished a recording and wondered why our headphones were silent, only to realize our Mac's sound is still routed to a virtual device.
- Sync Drift: In longer recordings, audio and video can slowly drift out of sync if drift correction isn't enabled on your aggregate device.
An integrated tool avoids these pitfalls entirely. Since the audio and video are captured together by the same app, they stay perfectly locked in sync from start to finish.
The real win here isn't just about capturing sound—it's about reducing your cognitive load. When your tools work without a fuss, you can pour all your mental energy into delivering a clear and engaging message. This is the core advantage of an all-in-one approach.
Putting the Creator First
At the end of the day, the best tool is the one that feels invisible. Free drivers like BlackHole are fantastic, and pro apps like Audio Hijack offer incredible power, but they serve different needs. For most people creating tutorials, demos, or presentations on a Mac, the most efficient solution is the one that doesn't demand technical gymnastics.
By building system audio capture directly into the recording process, integrated apps deliver a seamless experience. You can hit record with confidence, knowing the audio from your game, presentation, or app will be captured flawlessly, letting you focus on what really matters: creating great content.
Troubleshooting Common Mac Audio Recording Issues
You’ve gone through the steps to set up the perfect audio workflow, and you're ready to record... but then something goes wrong. Maybe the sound falls out of sync, your Mac throws up a permissions error, or you're just met with complete silence.
It’s frustrating, but don't worry—these are common roadblocks on macOS, and most of them have surprisingly straightforward fixes. Let's walk through the most frequent issues and get your recordings back on track.

Fixing Audio Drift in Long Recordings
Ever recorded a lengthy tutorial only to discover the audio slowly separates from the video? It’s a maddening issue known as audio drift, and it's a classic problem when you start combining multiple audio devices on a Mac.
Here's what’s happening behind the scenes. When you create a Multi-Output Device that includes both your physical speakers and a virtual driver like BlackHole, each device is running on its own internal digital clock. Over time, tiny mismatches between these clocks build up, causing that noticeable drift.
Luckily, Apple has a built-in fix. The Drift Correction option in Audio MIDI Setup forces the secondary devices to sync up with a designated "master" device. Forgetting to check this little box is probably the number one cause of misaligned audio.
To get it sorted:
- Open Audio MIDI Setup (just search for it with Spotlight).
- Click on your Multi-Output Device in the left sidebar.
- Make sure your primary output (like MacBook Pro Speakers) is set as the Master Device.
- This is the crucial part: check the Drift Correction box for your virtual driver (e.g., BlackHole).
That one simple check will keep your virtual driver locked in time with your main speakers, eliminating drift for good.
Handling macOS Security and Privacy Permissions
Modern versions of macOS are, rightly so, very protective of your system's resources. If your new virtual audio driver seems dead in the water, it’s probably just waiting for you to grant it permission to run.
You should get a pop-up right after installing a driver like BlackHole, but it's easy to miss. You can always grant access manually.
- Head over to System Settings > Privacy & Security.
- Scroll down and click on Microphone.
- Find your recording app (QuickTime, OBS, Screen Charm, etc.) and make sure its toggle is switched on.
Sometimes, the driver itself needs a deeper level of permission. Right after installation, check the General tab in Privacy & Security. If you see a message about "System software from developer..." being blocked, just click "Allow."
Solving the "I Can't Hear Anything" Problem
This is easily the most common complaint: you hit record, and suddenly you can't hear anything through your speakers or headphones. Nine times out of ten, it's because you missed a key step in the setup.
What's likely happened is that you've set your Mac's main sound output directly to the virtual driver. This sends all the audio to be recorded, but it never makes it to your physical speakers.
The fix is to always use your Multi-Output Device as the system's sound output. It's specifically designed to split the audio, sending it to both the virtual driver for recording and your speakers for monitoring.
If you’ve done that and still hear nothing, double-check your settings in System Settings > Sound > Output and make sure that Multi-Output Device is selected.
Achieving the Best Possible Audio Quality
Once you have everything working, a few simple best practices can take your recording from amateur to professional-sounding.
- Match Your Sample Rates: Mismatched sample rates are a recipe for clicks, pops, and distortion. In Audio MIDI Setup, make sure every device in your Multi-Output setup—speakers and the virtual driver—is set to the same rate. 44.1 kHz or 48.0 kHz are standard choices for Mac audio.
- Close Unnecessary Apps: Nothing ruins a perfect take like an unexpected email notification or a Slack chime. Before hitting record, quit any apps that aren't absolutely essential for your recording.
- Do a Test Recording: This is non-negotiable. Always record a quick 30-second test to check your levels and confirm everything is being captured correctly. It will save you the immense pain of discovering a problem after a long session.
Putting in a little effort to improve audio quality with small tweaks like these can make a massive difference in your final product.
Common Questions About Capturing Audio on Your Mac
Trying to record your Mac’s internal audio can definitely feel a bit confusing at first. It’s not as straightforward as you'd think, and a few common questions pop up all the time. Let's get them answered.
Can I Record Audio From Just One App on a Mac?
Yes, but this is where the free tools hit their limit. A free driver like BlackHole is an all-or-nothing deal—it grabs every single sound your Mac makes, including all those little notification dings and alerts.
If you need to isolate audio from a specific application, say, to record a podcast interview from your web browser without capturing a flurry of email notifications, you'll want to look at a paid tool. Apps like Loopback or Audio Hijack are built for exactly this. They let you pinpoint an app like Spotify or Chrome and create a dedicated audio source from it, giving you a perfectly clean recording.
Are Virtual Drivers Like BlackHole Safe for my Mac?
Absolutely. Well-known virtual audio drivers are completely safe for your Mac. BlackHole, for instance, is a respected open-source project that's been a go-to for Mac creators for years. It works as a low-level audio extension, which is simply why your Mac asks for special security permissions during the install process.
The most important thing is to always download these tools directly from the developer's official website or their GitHub repository. This ensures you're getting the real, untampered-with software and avoids any security risks. As long as you stick to the source, these drivers are perfectly safe.
How Can I Record My Microphone and System Audio at the Same Time on Mac?
This is probably the most frequent request, and the secret is to create a special "Aggregate Device" that bundles your mic and your system audio together. Your Mac actually has a built-in tool for this called Audio MIDI Setup.
Here’s the basic idea:
- Find and open Audio MIDI Setup (it's in your Applications/Utilities folder).
- Click the + icon in the bottom-left corner and choose Create Aggregate Device.
- In the new device window, check the boxes for both your microphone and your virtual driver (like "BlackHole 2ch").
- Here’s the pro tip: check the Drift Correction box for the secondary device in the list. This is crucial for keeping both audio streams perfectly synchronized over longer recordings.
After you've set this up, your new "Aggregate Device" will appear as a single input option in apps like QuickTime or OBS, letting you capture both your voice and your computer's audio in one go.
Does QuickTime Player Record System Audio on its Own?
Nope, not out of the box. If you fire up a new screen recording in QuickTime, you’ll only see options for connected microphones or "None" for audio. It's designed to capture external sound, not what's playing internally.
To get QuickTime to record your Mac's internal audio, you need to give it a source to listen to. That’s where a virtual audio driver like BlackHole comes in. Once you've installed it and set it as your Mac's sound output, "BlackHole" will magically appear as an option in QuickTime's audio dropdown menu. Select it, and you're good to go.
Ready to skip the complicated setups and start creating polished tutorials and demos in minutes? Screen Charm integrates system audio recording, a dynamic auto-zoom camera, and a simple editor into one seamless workflow. Get everything you need to produce professional-quality videos with zero hassle. https://screencharm.com