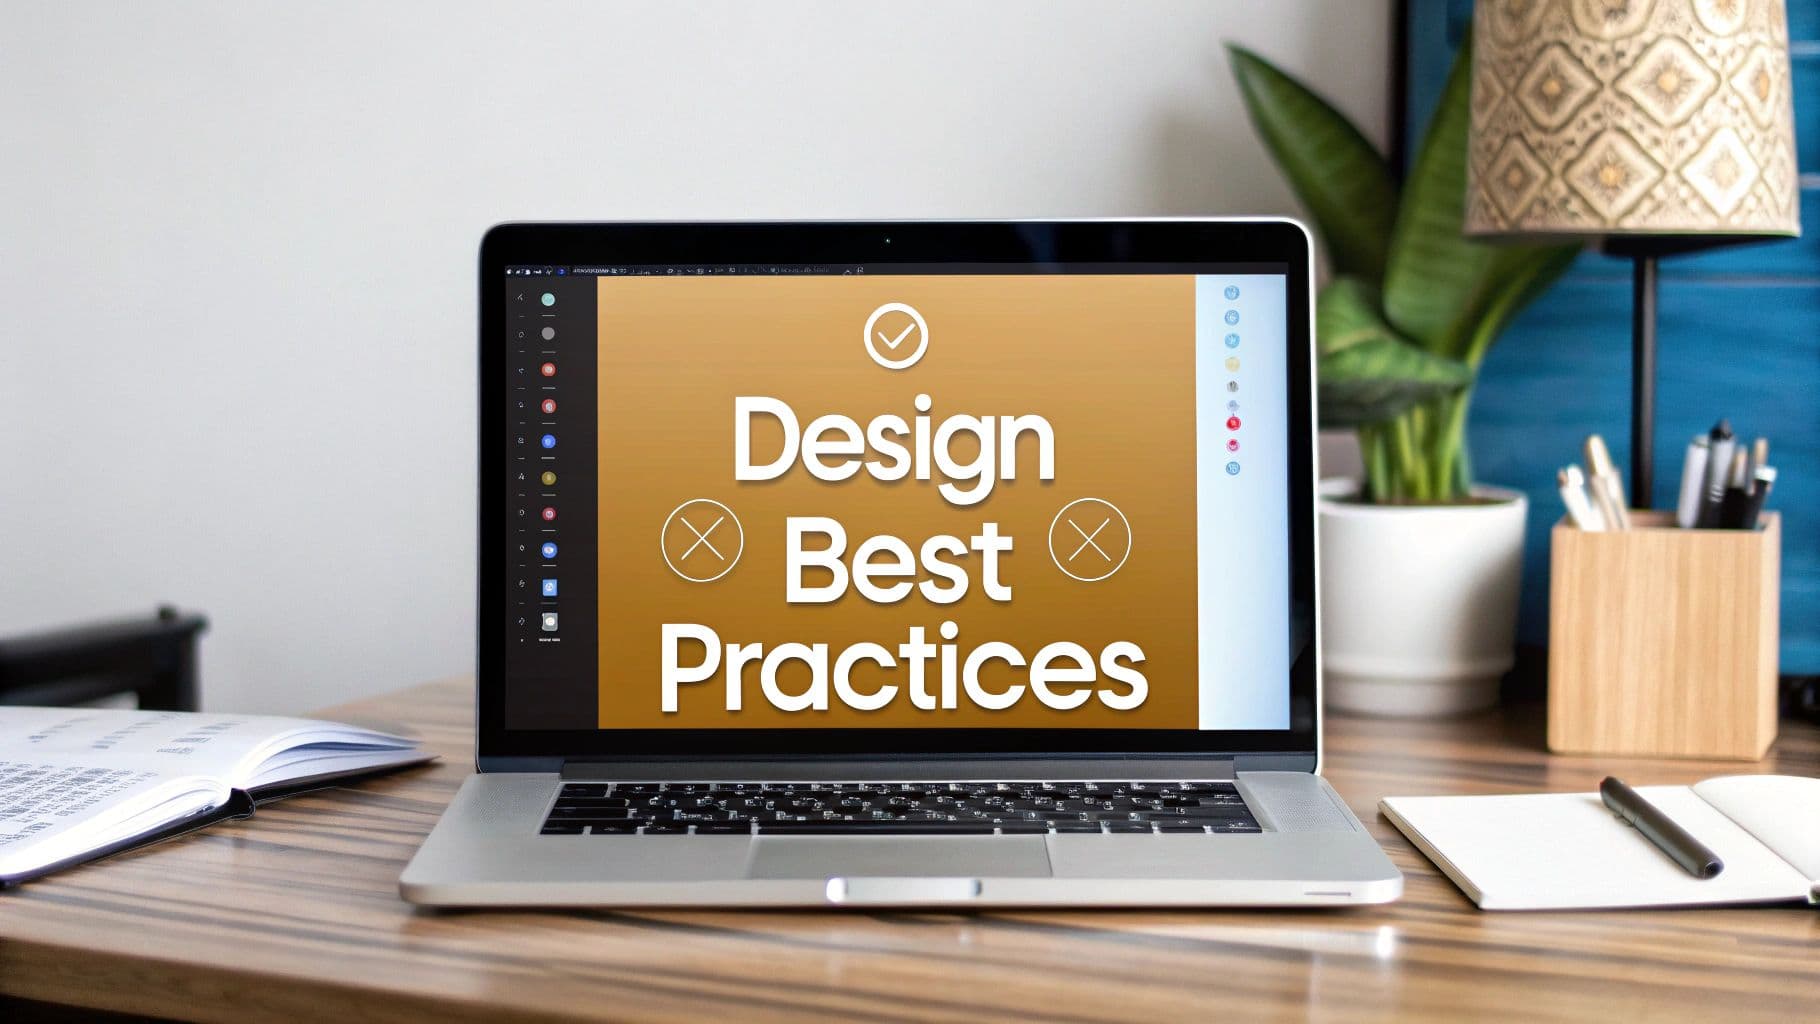
10 Best Practices for Online Teaching on macOS in 2026
The shift to online education has moved past simple screen sharing and generic webcam talks. Today, effective digital instruction demands a thoughtful blend of pedagogical strategy and polished production quality. It’s no longer just about what you teach, but precisely how you present it. This guide is built to deliver the definitive best practices for online teaching, moving far beyond basic advice to provide actionable, in-depth strategies tailored for creators on macOS.
We will explore a comprehensive set of techniques that bridge cognitive science with practical execution. You will learn to implement progressive disclosure with dynamic auto-zoom, design modular microlearning content, and master narration to keep learners engaged. The goal is to create truly effective learning experiences that resonate. Successful online teaching is fundamentally rooted in solid instructional design best practices, which provide the essential framework for structuring memorable and impactful content.
Whether you're developing a product demo for your software, an academic course, or a customer onboarding tutorial, these ten principles will equip you to craft experiences that are not only informative but genuinely captivating. This is about ensuring your knowledge isn't just broadcasted, but fully absorbed and retained. Let's dive into the methodologies that separate amateur screencasts from professional, high-impact instructional videos.
1. Progressive Disclosure with Dynamic Zoom and Focus
One of the most effective best practices for online teaching, especially for software tutorials and product demos, is adopting the principle of progressive disclosure. This technique involves revealing information gradually, guiding learners through a complex process one step at a time. It’s the digital equivalent of a guide pointing directly at what you need to see next, eliminating all other distractions. By preventing cognitive overload, you empower learners to absorb complex workflows without feeling overwhelmed.
This pedagogical approach pairs perfectly with the dynamic zoom and focus features found in modern screen recording software for macOS like Screen Charm. Instead of showing the entire user interface at once, you can automatically zoom into specific elements as you explain them. This directs the viewer's attention precisely where it needs to be, creating a clean, focused, and professional learning experience.
How to Implement Dynamic Zoom and Focus
Applying this technique is straightforward but requires planning. Before you hit record, map out the entire workflow you intend to demonstrate. Identify the key interface elements you'll interact with in sequence. These will become your "zoom points."
- Software Demos: When demonstrating a new feature, zoom into the menu item, then the specific button, and finally the dialogue box that appears. Each step is a distinct, focused action.
- Onboarding Tutorials: Guide new users by zooming from the "Sign Up" button to the form fields and then to the "Submit" button, making the initial experience feel simple and directed.
- Developer Walkthroughs: When showing an API integration, zoom into the specific lines of code being written, then to the terminal output, and finally to the resulting change in the application UI.
Key Insight: The goal is to create a guided journey. Dynamic zoom acts as a visual narrator, ensuring your audience never has to search the screen to figure out what you're referencing.
For macOS users, this technique is particularly effective for navigating the intricate UIs of professional applications. By combining this visual guidance with clear, concise narration, you create a seamless instructional video that feels both polished and easy to follow. Customize your cursor's appearance to further enhance visibility, and adjust the zoom speed to match your speaking pace for a natural rhythm.
2. Microlearning and Modular Content Design
Another essential entry among the best practices for online teaching is the adoption of microlearning and modular content design. This approach involves breaking down complex topics into small, digestible, and highly focused learning units, typically lasting between 2 and 10 minutes. Each module is designed to achieve a single, specific learning objective, making it easy for learners to consume and apply knowledge in short bursts, perfectly suited for today's on-demand learning culture.
By creating standalone modules, you empower learners to find and review exactly what they need without sifting through a lengthy video. This is particularly effective for asynchronous learning, where users access content at their own pace. This method respects the learner's time and attention span, leading to higher engagement and better knowledge retention.

How to Implement Microlearning with Modular Design
Implementing a microlearning strategy requires thinking about your course as a collection of interconnected building blocks rather than a single monolithic lesson. Start by mapping out your entire curriculum and then deconstruct it into its smallest logical components. Each component becomes a standalone video module.
- Software Feature Tutorials: Instead of one long "What's New" video, create a separate short tutorial for each new feature. This allows users to learn only about the updates relevant to their workflow.
- Customer Onboarding Series: Design a series of short videos that guide users through distinct setup stages, such as "Creating Your Account," "Setting Up Your First Project," and "Inviting Team Members."
- Developer Quick-Start Guides: Break down API integration into specific steps, with one video for "Generating Your API Key" and another for "Making Your First API Call."
Key Insight: The power of microlearning lies in its efficiency. It provides just-in-time knowledge, enabling learners to solve a specific problem or learn a new skill at the exact moment of need.
For creators on macOS, tools like Screen Charm make it easy to produce a high volume of polished, branded modules efficiently. You can create a template for your introductions and conclusions to maintain consistency across the series. For a deeper dive into structuring your content this way, explore our detailed guide on microlearning best practices. This approach not only improves the learning experience but also simplifies content updates, as you only need to re-record the specific module that has changed.
3. Narration and Audio Design Strategy
Visuals tell half the story, but high-quality audio tells the rest. One of the most critical best practices for online teaching is implementing a deliberate narration and audio design strategy. This goes beyond simply talking over your screen recording; it involves crafting a clear, engaging, and supportive auditory experience. Clear narration synchronized with on-screen actions, combined with strategic use of silence and subtle sound design, helps learners focus, reinforces key concepts, and makes your content accessible and professional.
This approach transforms a simple screen recording into a comprehensive lesson. Just as dynamic zoom guides the eye, a well-designed audio track guides the mind. By treating audio as a primary component of instruction, not an afterthought, you can significantly improve comprehension and learner engagement. macOS tools like Screen Charm allow for seamless integration of separately recorded, high-quality audio tracks, giving you full control over the final product.
How to Implement a Narration and Audio Strategy
A thoughtful audio strategy begins before you even press record. It requires scripting, using the right equipment, and editing with the learner's experience in mind.
- Scripting for Clarity: Write out your entire narration before recording. Read it aloud to catch awkward phrasing and ensure the timing aligns with your visual demonstration. This step eliminates "ums," "ahs," and rambling, resulting in a concise and confident delivery.
- Recording High-Quality Audio: Use a quality USB microphone like a Blue Yeti or Rode NT-USB+ in a quiet, echo-free space. For macOS users, an application like GarageBand is an excellent free tool for recording and editing narration tracks separately from your video.
- Strategic Pacing and Pauses: Don't rush. Speak at a measured pace and intentionally build in 2-3 second pauses after explaining a complex step or completing a significant action. This gives learners crucial time to process the information and follow along.
- Editing and Syncing: Record your narration as a separate audio file. This allows you to edit out mistakes without re-recording the entire video. You can then import this polished audio track into your video editor and precisely sync it with your screen recording.
Key Insight: Your voice is your most powerful teaching tool. A clear, well-paced script delivered with a quality microphone conveys authority and respect for your learner's time and attention.
For macOS creators, this workflow is streamlined. Use QuickTime for the screen capture, GarageBand for narration, and then combine and edit them in a tool like Screen Charm or iMovie. This separation of video and audio capture provides the flexibility needed to create a truly polished and effective instructional video that stands out.
4. Active Learning and Interactive Elements
Passive viewing is the enemy of retention. One of the most critical best practices for online teaching is to transform passive consumption into active participation. Active learning strategies require learners to engage directly with the content through interactive elements like quizzes, polls, and embedded exercises. This approach shifts the learner from being a spectator to a participant, dramatically improving engagement and long-term knowledge retention.
By integrating decision points and knowledge checks directly into your videos, you create a responsive learning environment. Instead of simply watching a tutorial, the learner is prompted to apply their knowledge in real-time. This participatory model, championed by educational research and modern learning platforms, ensures that viewers are not just hearing the information but actively processing and applying it.

How to Implement Interactive Elements
Integrating active learning requires thoughtful placement of interactive prompts. These elements should feel like natural extensions of the lesson, not jarring interruptions. Plan where to insert these moments to reinforce key concepts or assess understanding before moving on. To effectively implement active learning strategies and foster engagement, it's crucial to select the best video conferencing tools for online tutoring that support rich interaction.
- Coding Tutorials: After explaining a function, embed a small coding challenge directly in the video. The lesson only proceeds after the learner enters the correct syntax.
- Soft Skills Training: Use branching scenarios where learners must choose a response in a simulated conversation. The video then shows the consequence of their choice.
- Software Demos: Place a short "check for understanding" quiz after demonstrating a complex feature. This confirms the viewer grasped the steps before you introduce the next workflow.
Key Insight: Interactivity transforms a monologue into a dialogue. Each quiz or exercise is an opportunity for the learner to "talk back" to the content, confirming their understanding and solidifying the lesson.
For macOS creators using tools to build instructional content, these principles are paramount. The goal is to break the passive "lean-back" viewing habit. By inserting interactive elements every 3-5 minutes, you can reset attention spans, provide immediate feedback, and create a learning experience that feels personalized and deeply effective. This method keeps learners leaning in, focused, and ready for what comes next.
5. Personalization and Adaptive Learning Paths
Another of the core best practices for online teaching is moving beyond a one-size-fits-all model by implementing personalization and adaptive learning paths. This strategy tailors the educational journey to each learner's specific needs, prior knowledge, and performance. Instead of forcing everyone through the same linear sequence, adaptive learning creates a responsive, individualized experience that both challenges advanced learners and supports those who need extra help.
This approach is highly effective for building scalable training programs, especially for software and technical skills. It ensures that learners focus their time where it is most needed, skipping concepts they have already mastered and receiving remediation for topics they find difficult. By acknowledging and responding to individual differences, you dramatically increase engagement, knowledge retention, and overall learner satisfaction.
How to Implement Adaptive Learning
Building a simple adaptive structure into your course is more achievable than it sounds, especially when starting with role-based or skill-level variations. The key is to define clear decision points and content branches before you begin recording your video lessons.
- Software Demos: Create distinct video paths for "Beginner" and "Advanced" users. After an introductory video, a simple quiz or self-selection question can direct them to the appropriate tutorial series, ensuring the content complexity matches their skill level.
- Onboarding Tutorials: Structure your onboarding to address different user roles. A developer will need a different set of initial tutorials than a project manager. Use a simple menu or interactive element to guide them to the right path from the start.
- Developer Walkthroughs: For complex API documentation, build prerequisite checks. Before a user can view a video on an advanced endpoint, confirm they have completed the "Authentication Basics" module. If they haven't, automatically direct them back to the foundational content.
Key Insight: The goal is to make learning more efficient and relevant. Personalization respects the learner's time and existing knowledge, creating a path of least resistance to mastery.
For macOS-based creators developing training for products like design software or development tools, this strategy is invaluable. You can create foundational modules on setting up the macOS environment and then branch into specific, role-based workflows. This ensures every user, regardless of their starting point, receives a learning experience that feels custom-built for them, leading to faster adoption and higher proficiency.
6. Real-World Context and Authentic Examples
One of the most powerful best practices for online teaching is to root your lessons in authentic, real-world scenarios. This approach, known as authentic learning, moves beyond theoretical concepts to solve genuine problems using the actual tools and workflows learners will encounter in their professional lives. By demonstrating immediate relevance and practical application, you significantly boost learner motivation and the successful transfer of skills from the tutorial to the real world.
This pedagogical strategy is about showing, not just telling. Instead of a sanitized, perfect demonstration, you present the messy, unscripted reality of how a tool is used to achieve a tangible outcome. For creators on macOS using tools like Screen Charm, this means recording genuine workflows within the actual applications their audience uses daily, making the learning experience feel less like a lecture and more like looking over the shoulder of an experienced colleague.
How to Implement Authentic Learning
Grounding your content in reality requires shifting your focus from features to outcomes. Start by identifying a common, painful problem your audience faces, and then build your tutorial around solving it from start to finish.
- Software Demos: Instead of just explaining a feature, show how a freelance designer uses it to meet a tight client deadline. For example, demonstrate a real Figma workflow from an actual agency project to create a component library.
- Onboarding Tutorials: Frame your Shopify setup tutorial around launching a real e-commerce store, from adding the first product to analyzing initial sales data. Show the before and after to highlight the business impact.
- Developer Walkthroughs: Rather than a generic "Hello, World" example, use a real open-source project scenario from GitHub Learning Lab to teach a new API, including the inevitable troubleshooting and debugging steps.
Key Insight: The goal is to make learning stick by proving its value. When learners see a process that directly mirrors their own challenges and professional environment, the instruction becomes immediately applicable and memorable.
To achieve this, interview actual customers about their pain points and workflows. Share honest stories about failures and the problem-solving journey. By contextualizing every technical step within a broader business goal, you transform a simple how-to video into a compelling case study that resonates deeply and proves your tool’s worth.
7. Multi-Sensory and Multi-Modal Instruction
Catering to diverse learning preferences is one of the most impactful best practices for online teaching. This is where multi-sensory and multi-modal instruction shines. This approach leverages multiple channels of information-visual, auditory, textual, and kinesthetic-to deliver a richer, more effective learning experience. By combining video lectures with interactive exercises, downloadable guides, and clear text, you accommodate different learning styles and reinforce complex concepts from multiple angles.
This method, grounded in principles like Richard Mayer's Cognitive Theory of Multimedia Learning, recognizes that learners process information more effectively when it's presented in both visual and verbal forms. Instead of relying solely on a screen recording, you build a comprehensive learning package that engages learners on multiple levels, significantly boosting retention and comprehension.

How to Implement Multi-Modal Instruction
Integrating a multi-modal strategy requires you to think beyond the video itself and consider the entire learning ecosystem. Your screen recording is the centerpiece, but the supplementary materials are what solidify the knowledge.
- Technical Training: Combine a Screen Charm video demonstrating an AWS setup with downloadable PDF study guides and links to hands-on labs. The video shows the "how," while the text and labs provide the "why" and the practical application.
- Coding Tutorials: Supplement a video walkthrough of a new Swift feature with an interactive coding environment where learners can write and test code. Platforms like Codecademy excel at this by pairing video with a live editor.
- Complex Concepts: Use your video to explain a high-level concept, but embed links to detailed documentation, diagrams, or articles for learners who want to dive deeper. This respects different levels of prior knowledge.
Key Insight: A great online course isn't just a video; it's a curated package of resources. Multi-modal instruction transforms a passive viewing experience into an active learning environment, ensuring the information sticks.
For macOS creators developing intricate software tutorials, this approach is essential. Use Screen Charm to create the core visual demonstration, then export a transcript to serve as a readable guide. Supplement this with annotated screenshots or a Keynote presentation summarizing the key takeaways, offering learners multiple ways to review and master the content.
8. Spaced Repetition and Retrieval Practice
One of the most powerful best practices for online teaching is to integrate principles from cognitive science, specifically spaced repetition and retrieval practice. This approach moves beyond a “one-and-done” teaching model and focuses on building durable, long-term knowledge. Spaced repetition involves revisiting topics at increasing intervals, while retrieval practice requires learners to actively recall information from memory, strengthening neural pathways.
Instead of cramming information into a single session, this method strategically distributes learning over time. This process interrupts the natural "forgetting curve" described by Hermann Ebbinghaus, making learning more efficient and effective. When you design courses that prompt students to remember what they learned yesterday, last week, and last month, you are engineering a more robust learning experience that combats passive consumption of content.
How to Implement Spaced Repetition and Retrieval
Building this into your online course structure requires intentional design from the outset. You can leverage simple tools and scheduling to turn your instructional videos into powerful memory-building assets. The key is to make recalling information a regular, low-stakes activity.
- Curriculum Design: Plan your syllabus to include cumulative review modules. A video lesson in week four should require recalling concepts from week one, forcing students to retrieve older information.
- Low-Stakes Quizzing: Begin each new video module with a short, ungraded quiz that asks questions about the previous one. This primes the brain for learning and reinforces prior concepts.
- Practical Application: In a software tutorial, rather than re-explaining a basic function, prompt the viewer to perform it from memory. For instance, ask them to "recall how we created a new layer in the last lesson" before introducing the next step.
Key Insight: The goal is to make retrieval an active habit, not a high-pressure event. Frequent, low-stakes recall is significantly more effective for long-term retention than a single, high-stakes final exam.
For educators on macOS, you can create simple, scheduled reminders using Calendar or Reminders to prompt students to revisit key video lessons after one day, one week, and one month. Combine this with quick online quizzes or discussion prompts to facilitate active recall. To deepen your understanding of these techniques, explore these knowledge retention strategies that can transform how your students learn and remember.
9. Clear Learning Objectives and Scaffolding
A cornerstone of effective education, and one of the most vital best practices for online teaching, is the establishment of clear learning objectives supported by instructional scaffolding. This approach begins by explicitly telling learners what they will be able to do after completing the lesson. It then provides structured support, like guardrails, that is gradually removed as their competence and confidence grow, ensuring they can eventually perform the task independently.
This pedagogical framework, rooted in principles from educational theorists like Vygotsky and Bloom, is exceptionally powerful for self-paced online learning. When learners know the exact destination (the objective) and have a clear, supported path to get there (the scaffolding), they remain motivated and focused. This prevents the frustration of getting lost in complex software or abstract concepts, making the learning process efficient and empowering.
How to Implement Objectives and Scaffolding
The key is to move from "what I will teach" to "what they will be able to do." Start by defining measurable outcomes using action verbs, then build a support system to help learners achieve them. This transforms passive viewing into active learning.
- Software Demos: State the objective upfront: "By the end of this video, you will be able to create a custom animation preset in Screen Charm." Then, start with a complete, narrated walkthrough. Follow up with a template or checklist for learners to replicate the process, gradually removing prompts in subsequent tutorials.
- Onboarding Tutorials: Frame objectives from the user's perspective: "You will be able to publish your first project in under five minutes." Use on-screen text overlays as initial scaffolding, pointing to UI elements. In later videos, fade these supports, encouraging users to recall the steps themselves.
- Developer Walkthroughs: An objective might be: "You will be able to integrate our API to fetch user data." Provide initial boilerplate code (scaffolding), then explain each block. Challenge the learner to write the next function with fewer hints, referencing the documentation as a final support structure.
Key Insight: Clear objectives provide the "what" and "why" of a lesson, while scaffolding provides the "how." This combination builds both skill and self-sufficiency, which is crucial for engagement in an online setting.
For macOS instructors creating tutorials for sophisticated applications, this method is indispensable. Clearly state what users will accomplish within the macOS environment and use visual cues like callouts and annotations as your initial scaffolding. To dive deeper into structuring your lessons, explore these instructional design best practices to create a truly effective learning journey.
10. Community, Peer Learning, Collaborative Discussion, and Mobile-Optimized Accessibility
One of the most transformative best practices for online teaching is to build a learning environment that extends beyond the content itself. This involves fostering a vibrant community through peer learning and collaborative discussion, while ensuring the entire experience is accessible to everyone, especially on mobile devices. This dual-pronged approach combats the isolation often felt in online courses and removes barriers to entry, creating a more inclusive and engaging ecosystem.
By integrating structured peer review, discussion forums, and group projects, you shift learners from passive consumers to active participants. This social learning, grounded in theories from Vygotsky and Lave, boosts accountability and deepens understanding. Simultaneously, prioritizing accessibility standards like captions, transcripts, and screen-reader compatibility ensures that your meticulously crafted content can reach and impact the widest possible audience, regardless of ability or device.
How to Implement Community and Accessibility
Building an effective learning community and ensuring accessibility requires intentional design from the outset. Your goal is to create spaces for interaction and to design content that is universally usable.
- Software Demos: After a tutorial video, post a challenge in a community forum (like a Slack channel or Discord server) asking learners to replicate the process and share a screenshot of their result. Encourage peer feedback on their attempts.
- Onboarding Tutorials: Create a dedicated "introductions" channel where new users can share their goals. For accessibility, ensure all tutorial videos have accurate, human-verified captions and provide a downloadable transcript, making the content searchable and reviewable.
- Developer Walkthroughs: Host your code on GitHub and use its "Discussions" feature for Q&A, allowing the community to help solve problems. For mobile accessibility, test your course platform and videos on an iPhone to ensure controls are usable and text is readable on smaller screens.
Key Insight: A course without community is just a collection of files. An inaccessible course excludes a significant portion of your potential audience. Combining both creates a powerful, resilient, and inclusive learning experience.
For creators on macOS, many tools are available. Use the built-in accessibility features like VoiceOver to test your course pages for screen-reader compatibility. When creating videos with Screen Charm, always generate captions. Pair this with a platform like Mighty Networks or Circle to build a dedicated community hub that is both collaborative and mobile-friendly, ensuring your teaching has maximum reach and impact.
Comparison of 10 Online Teaching Best Practices
| Approach | Implementation Complexity (🔄) | Resource Requirements (⚡) | Expected Outcomes (📊) | Ideal Use Cases (💡) | Key Advantages (⭐) |
|---|---|---|---|---|---|
| Progressive Disclosure with Dynamic Zoom and Focus | Moderate–High — needs planning of zoom/timing 🔄 | Moderate — screen-recording tools with auto-zoom, editing ⚡ | High retention & reduced cognitive load 📊 | Feature walkthroughs, onboarding, support demos 💡 | Focused attention and clear stepwise progression ⭐ |
| Microlearning and Modular Content Design | Low–Moderate — need roadmap for modules 🔄 | Low — short recordings, lightweight production ⚡ | Better access, quick uptake, good short-term retention 📊 | Just-in-time training, mobile learners, feature tutorials 💡 | Fast to produce/update and highly shareable ⭐ |
| Narration and Audio Design Strategy | Moderate — scripting and sync with visuals 🔄 | Moderate–High — microphones, quiet space, talent ⚡ | Improved accessibility, engagement, clarity 📊 | Any instructional video; learners needing auditory support 💡 | Accessibility and emotional engagement through sound ⭐ |
| Active Learning and Interactive Elements | High — branching and UX design required 🔄 | High — interactive platforms or LMS integration ⚡ | Strong engagement, immediate feedback, better retention 📊 | Skills practice, assessment-driven courses, simulations 💡 | Real-time feedback and measurable learner data ⭐ |
| Personalization and Adaptive Learning Paths | Very High — complex branching and rules 🔄 | Very High — data, analytics, algorithmic infrastructure ⚡ | Increased satisfaction, completion, accelerated learning 📊 | Large, diverse cohorts; role-based training; long-term programs 💡 | Tailored pacing and targeted remediation for better outcomes ⭐ |
| Real-World Context and Authentic Examples | Moderate — research and case preparation 🔄 | Moderate — access to real data/collaboration with users ⚡ | Higher transfer to practice; increased motivation 📊 | Professional training, case-study based courses, product demos 💡 | Credibility and immediate applicability to learners' work ⭐ |
| Multi-Sensory and Multi-Modal Instruction | High — coordination across formats 🔄 | High — multimedia assets, transcripts, design resources ⚡ | Strong comprehension and accessibility across learners 📊 | Complex concepts, inclusive courses, blended learning 💡 | Reinforces learning via multiple channels; broad accessibility ⭐ |
| Spaced Repetition and Retrieval Practice | Moderate — scheduling and content planning 🔄 | Moderate — quizzing tools or SRS software ⚡ | Superior long-term retention and transfer 📊 | Language learning, certification prep, factual mastery 💡 | Efficient memory consolidation and metacognitive gains ⭐ |
| Clear Learning Objectives and Scaffolding | Moderate — instructional design expertise needed 🔄 | Low–Moderate — content authoring and examples ⚡ | Clear progression, better self-assessment, reduced overload 📊 | Self-paced modules, competency-based learning, assessments 💡 | Focused outcomes and structured support for progression ⭐ |
| Community, Peer Learning, Collaborative Discussion, and Mobile-Optimized Accessibility | High — community management and accessibility work 🔄 | High — platform features, moderation, captioning services ⚡ | Increased retention, engagement, inclusive reach 📊 | Cohort courses, peer-review workflows, support ecosystems 💡 | Social learning, scalable support, and broad accessibility ⭐ |
Putting It All Together: Your Blueprint for Impactful Teaching
Navigating the landscape of online education can feel complex, but the journey from a good instructor to a great one is built on a foundation of intentional design and thoughtful execution. The ten best practices we've explored in this guide are not just a checklist; they represent a holistic blueprint for creating truly impactful online teaching experiences. Moving beyond the simple act of recording a screen, these strategies empower you to architect learning that is engaging, effective, and deeply respectful of your audience's time and attention.
The core theme connecting all these principles is a shift from passive information delivery to active learning engineering. It’s the difference between showing someone a map and guiding them on a journey. Practices like Progressive Disclosure with Dynamic Zoom and creating Microlearning Modules are about managing cognitive load, ensuring you present the right information at the right time, without overwhelming the learner. This is where the technical craft of video production directly serves pedagogical goals, using visual focus to mirror the mental focus you want to cultivate.
From Strategy to Workflow
Mastering these concepts requires integrating them into your daily workflow. It means that before you even think about hitting the record button, you're outlining Clear Learning Objectives and scripting your narration for maximum clarity and impact. It means you're proactively designing for Multi-Sensory Instruction and planning opportunities for Spaced Repetition to help learners encode information into long-term memory.
The true power of these best practices for online teaching emerges when they are combined. For instance:
- A lesson built on Real-World Context becomes exponentially more powerful when delivered in a Microlearning format that a learner can access on their mobile device just before applying the skill.
- An Interactive Element, like a short quiz, is most effective when it follows a clearly scaffolded explanation and provides immediate, personalized feedback.
- Building a sense of Community is enhanced when learners are discussing high-quality, accessible content that uses dynamic visuals to make complex topics understandable for everyone.
For creators, especially those on macOS, the goal is to find tools that make implementing these advanced strategies feel effortless. The less time you spend wrestling with a complicated video editor, the more time you can devote to refining your script, sourcing authentic examples, and engaging with your learning community. This is where applications specifically designed for instructional content become invaluable, acting as a bridge between your pedagogical vision and the final polished product.
The Lasting Impact of Intentional Instruction
Ultimately, adopting these best practices is about more than just producing slicker videos or getting higher completion rates. It's about empowering your learners. When you create content that is focused, accessible, and designed for retention, you give your audience the best possible chance to not just watch, but to learn, apply, and master new skills. You are building their confidence, enabling their professional growth, and contributing to a more effective and engaging digital learning ecosystem.
Your journey to mastering online teaching is an iterative process. Start small. Pick one or two strategies from this list to implement in your next project. Perhaps you'll focus on improving your audio quality and scripting, or maybe you'll experiment with dynamic zoom to guide your viewer's attention more precisely. As you build these habits, you will see a tangible difference in how your audience responds to your content and, more importantly, in what they are able to achieve because of it.
Ready to put these principles into action without the technical headache? Screen Charm is a video and screen recording application built for macOS that makes implementing these best practices intuitive. With features like automatic zoom, cursor effects, and a streamlined editing workflow, you can focus on creating high-impact instructional content, not on fighting with your software. Download Screen Charm today and start creating tutorials that truly teach.