Change Cursor on MacBook: A Quick Guide to Better Visibility
Let's be honest, we've all done it. You're deep in your workflow, navigating a massive 4K display or a sprawling multi-monitor setup, and suddenly... your cursor vanishes. That tiny black pointer just disappears into the digital abyss.
It's a small but surprisingly common frustration that can instantly break your concentration. But what if I told you that changing your cursor is more than just a cosmetic fix? It's a genuine productivity hack that can seriously reduce eye strain and streamline your day on a Mac.
Why a Custom Cursor Is Your Secret Productivity Weapon
Think about it. For developers scanning thousands of lines of code or designers meticulously editing on a complex canvas, a more visible cursor is a total game-changer. You can find and position your pointer in a fraction of a second, saving precious moments that really add up. It’s a simple tweak that helps you stay in the zone, cutting down on those tiny interruptions and mental hiccups.
Making Your Screen Recordings Crystal Clear
The perks go way beyond your personal workflow, especially if you create any kind of content. When you’re recording a software tutorial or a product demo, your cursor is the star of the show—it guides your audience's eyes. A standard, small pointer can easily get lost against a busy interface, leaving viewers squinting and struggling to figure out where you’re clicking.
A custom cursor, on the other hand, is a clear, confident guide. By simply making it larger or giving it a high-contrast color, you make sure every click and every movement is impossible to miss. This is absolutely essential for effective teaching and taps into a core principle of visual learning, which helps people absorb and retain information far better. You can dive deeper into this topic in our guide to creating content for visual learners.
A distinct cursor transforms a simple screen recording into a clear, professional presentation. It’s not just about what you show, but how effectively you guide your audience through it.
Apple Is Finally Paying Attention
This need for better on-screen visibility hasn't gone unnoticed by Apple. If you look back, the evolution is pretty clear. Between 2018 and 2023, macOS went from having almost no pointer customization to featuring a dedicated Pointer section right in the Accessibility settings.
As 4K and 5K displays became the norm, user feedback on support forums constantly brought up the "too small" cursor problem. Apple listened. Newer versions of macOS, like Monterey and Ventura, finally introduced controls for the pointer's outline and fill colors, a clear acknowledgment that a customizable cursor is a modern necessity, not just a niche feature. You can find more details on this shift over at Tom's Guide.
Customizing Your Cursor with Built-In macOS Tools
Before you start hunting for third-party apps, you might be surprised by how much you can do with the tools Apple has already baked right into macOS. The easiest way to change the cursor on your MacBook for better visibility is usually hiding in plain sight within your System Settings—no downloads required.
Apple built these controls for accessibility, but they’re a game-changer for anyone, especially if you're working on a massive monitor or just tired of losing that tiny pointer in a sea of windows.
Where to Find the Cursor Settings
Getting there is simple. Just open up System Settings and find Accessibility in the sidebar. From there, click into the Display section. This is where the magic happens. Look for the Pointer tab, which is your command center for all things cursor-related.
Making Your Pointer Bigger and Bolder
The first thing you’ll see in the Pointer settings is a slider for Pointer size. This is your most direct tool for making the cursor more prominent. As you drag the slider, you'll see the pointer scale up in real-time, letting you dial in the exact size that feels right for your screen and how you work.
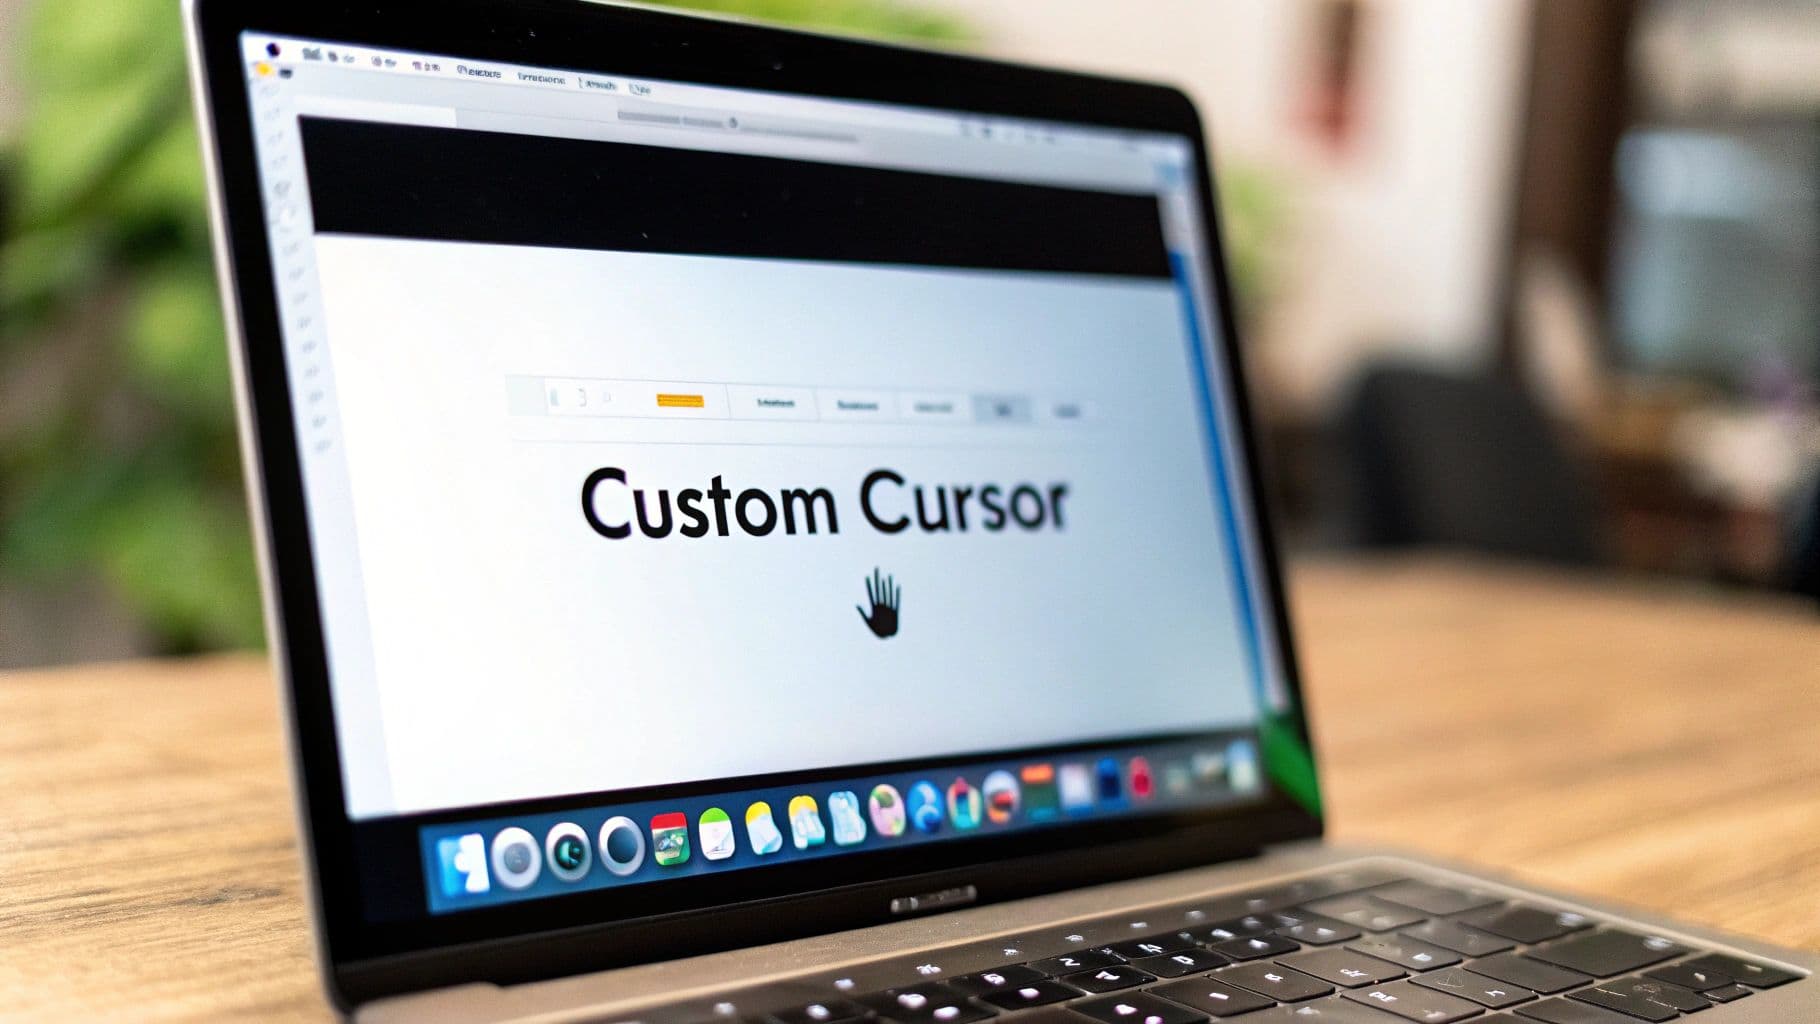
Here’s a look at what that panel looks like.
You can see how Apple laid everything out clearly, giving you instant feedback as you make adjustments.
But size is only half the story. You can also play with the colors to really make your cursor stand out. You’ve got two main controls here:
- Pointer outline color: This changes the border around the cursor. I find that setting this to something bright and punchy, like a vibrant yellow or cyan, makes it pop against dark backgrounds. It's incredibly helpful in apps like code editors or design software that use a dark theme.
- Pointer fill color: This controls the main body of the pointer. You can create some seriously high-contrast combinations, like a classic black fill with a crisp white outline, which guarantees you’ll never lose sight of it, no matter what’s behind it.
Pro Tip: Don't be afraid to experiment. A bright red outline might be perfect for scrubbing through video editing timelines where precision is key, while a more subtle blue could be better for everyday browsing. The right combination really depends on your specific workflow.
Before we move on, let's quickly recap what these built-in macOS features offer.
macOS Cursor Customization Features
| Feature | What It Does | Best For |
|---|---|---|
| Pointer Size | Adjusts the scale of the cursor from its default size to a much larger one using a simple slider. | Anyone who loses their cursor on large or high-resolution displays. |
| Pointer Outline Color | Changes the color of the cursor's border. | Creating high-contrast visibility against specific background colors, like in dark-mode apps. |
| Pointer Fill Color | Changes the interior color of the cursor. | Ensuring the cursor is always visible, regardless of the application window or wallpaper behind it. |
| Shake Mouse to Locate | Temporarily magnifies the cursor to a giant size when you quickly shake the mouse or trackpad. | Instantly finding a lost cursor on a busy screen or multi-monitor setup. |
These native options cover the most common needs for cursor customization without requiring any extra software.
Never Lose Your Cursor Again
Even with a bigger, more colorful pointer, it's still possible for it to get lost in the shuffle, particularly if you’re juggling multiple monitors. Thankfully, Apple thought of that and included a brilliant little feature: Shake mouse pointer to locate.
When you flip this on, a quick, vigorous shake of your mouse (or a fast swipe on your trackpad) makes the cursor momentarily balloon to a massive size. It's impossible to miss. I've found this feature to be a huge time-saver, completely eliminating those frustrating seconds spent scanning the screen. You can toggle it on or off right from that same Pointer settings panel.
What About Third-Party Apps for Deeper Customization?
The built-in macOS tools are a great starting point for making your cursor bigger and more colorful, but they're just that—a starting point. What if you want to really change things up? That’s where third-party apps come in, unlocking a whole new level of creative control over how you change the cursor on your MacBook.
These aren't just about simple tweaks. Imagine you're giving a live presentation and want to dim the entire screen except for a spotlight around your pointer. Or maybe you're recording a software tutorial and need animated click effects so your viewers never miss an action. This is the kind of advanced functionality that specialized Mac utilities bring to the table.
The Give and Take of Using External Tools
Before you jump in and download the first app you find, it's worth thinking about the trade-offs. The big win, of course, is getting features Apple simply doesn't build into macOS, from custom cursor libraries to unique animations that can give your work a polished, professional look.
But there are a few potential downsides. Some of these apps run constantly in the background, which could introduce a tiny bit of a performance lag. You might also run into weird compatibility quirks, like a custom cursor not showing up properly over a system-level password prompt. And, naturally, the most powerful tools usually aren't free, so you'll have to factor in another software purchase.
A key thing I've learned is to consider how an app fits into your actual workflow. The best ones feel like a natural extension of your Mac; the clunky ones just get in the way, forcing you to constantly turn them on and off.
What to Look for in a Cursor App
When you start browsing for an app, think about the specific problem you're trying to solve. For a lot of people, it's just about making the cursor easier to see. Tools on the Mac App Store, like CursorEffect2, are built for exactly this. I’ve seen reviews where users rave about how helpful it is on “multiple large screens” where it is “very easy to lose” the pointer.
But those same reviews often highlight the common headaches of system-wide cursor tools. People mention that it can be tricky to interact with system dialogs and get frustrated when they can't quickly turn the effects off for serious work. This is a perfect example of why a more targeted approach is often better, especially if you're creating content. You can dive deeper into how different tools manage this in our guide on how to create a custom cursor for specific projects.
In the end, the right app for you really comes down to what you need. If it’s for day-to-day use, a simple visibility helper might be all you need. But for something specialized like screen recording, you’ll want a tool that gives you more control without messing with your Mac's core functions.
The Professional’s Choice: Custom Cursors for Screen Recordings
When you’re creating content for an audience, simply changing your system-wide cursor just doesn’t cut it. It’s a great trick for personal visibility, but it becomes a clunky, all-or-nothing solution for professional work. You really don't want your giant, neon-yellow pointer showing up in every app, all the time.
This is exactly why dedicated screen recording software is a game-changer. Tools like Screen Charm are built on a smart principle: they only change the cursor’s appearance in the final video. Your everyday system cursor is left completely alone. This gives you the best of both worlds—a clean, normal desktop for your own use and a perfectly clear, branded pointer in your professional recordings.
From Simple Pointer to Engagement Tool
For content creators, a custom cursor is far more than a way to be seen. It’s a powerful tool for guiding your audience and reinforcing your brand. Think of it as your digital laser pointer, directing focus, highlighting key information, and adding a subtle touch of your brand's personality with every move.
Professionals rely on this separation between the system cursor and the recording cursor. It means you can record a detailed tutorial with a large, highlighted pointer, and then immediately tab over to Slack or email without that same massive cursor getting in your way. It’s a seamless workflow that completely removes the hassle of digging into System Settings to toggle accessibility features on and off.
The real magic of a professional recording tool is that it treats the cursor as a dynamic part of the story you're telling, not just a static system setting. It lets you guide the viewer’s eye with total precision.
Features That Truly Matter
Modern screen recorders for macOS offer features that go way beyond just tweaking color and size. They are designed to make your tutorials, demos, and presentations more effective and much easier for your audience to follow.
Here are a few key features that really set these tools apart:
- Automatic Cursor Zoom: The software can intelligently track your pointer, smoothly zooming in on the exact button or menu you're about to click. This saves a ton of tedious editing work later on.
- Custom Icon Styles: Why stick with the default arrow? You can often use branded icons, different shapes, or other graphics that match your content’s style.
- Click Highlighting and Animations: Many tools can add a subtle ripple effect or a colored circle around your cursor whenever you click, giving viewers a clear, immediate visual cue.
These small touches help tell a much clearer story on screen. To take your videos to the next level, think about incorporating proven visual storytelling techniques to command your audience's attention. When you combine a custom cursor with strong narrative elements, your content becomes incredibly compelling.
Ultimately, a smooth process is what makes great content possible. That’s why picking the best screen capture app for Mac is crucial for a fluid workflow, centralizing all your recording and cursor customization needs into a single, powerful tool.
How to Choose the Right Cursor Customization Method
So, you've got a few ways to change the cursor on your MacBook, but which one is right for you? It really boils down to what you're trying to accomplish. Are you just trying to find your pointer on a giant monitor, or are you creating a polished product demo for thousands of viewers?
Let's break down the options so you can pick the best tool for the job.
Start with macOS Accessibility for Everyday Use
Honestly, your first stop should always be the built-in macOS Accessibility settings. If you’re constantly losing that tiny pointer on your screen or just want something with a bit more contrast to ease eye strain, Apple’s native tools are fantastic.
They’re simple, reliable, and have zero impact on your Mac’s performance. Best of all, they're already there—no installation required. For a permanent, day-to-day change, this is almost always the answer.
Grab a Third-Party App for Live Presentations
When you need temporary, eye-catching effects for a live audience, a general third-party utility is the way to go. Think about a live webinar where you want to add a spotlight to highlight a specific button, or a virtual classroom where animated clicks help students follow your every move.
These apps are built for immediate visual feedback. The downside is they can sometimes interfere with system pop-ups or require you to remember to turn them on and off. They’re great for temporary flair but not so much for permanent changes or clean screen recordings.
Use a Specialized Tool for Professional Content
If you're creating content like product tutorials, software demos, or marketing videos, a dedicated tool like Screen Charm is in a league of its own. Its biggest advantage is that it only changes the cursor in your final video. Your system pointer stays exactly as it is.
This separation is a game-changer for your workflow. You can record with a clean, branded, and highly visible cursor without it getting in the way of your actual work on the computer.
I've learned that using a dedicated recording tool isn't just about making things look good; it's a strategic workflow decision. It cleanly separates my personal desktop experience from the polished, professional presentation I'm delivering to my audience.
This little decision tree can help you figure out which path makes the most sense when you hit the record button.
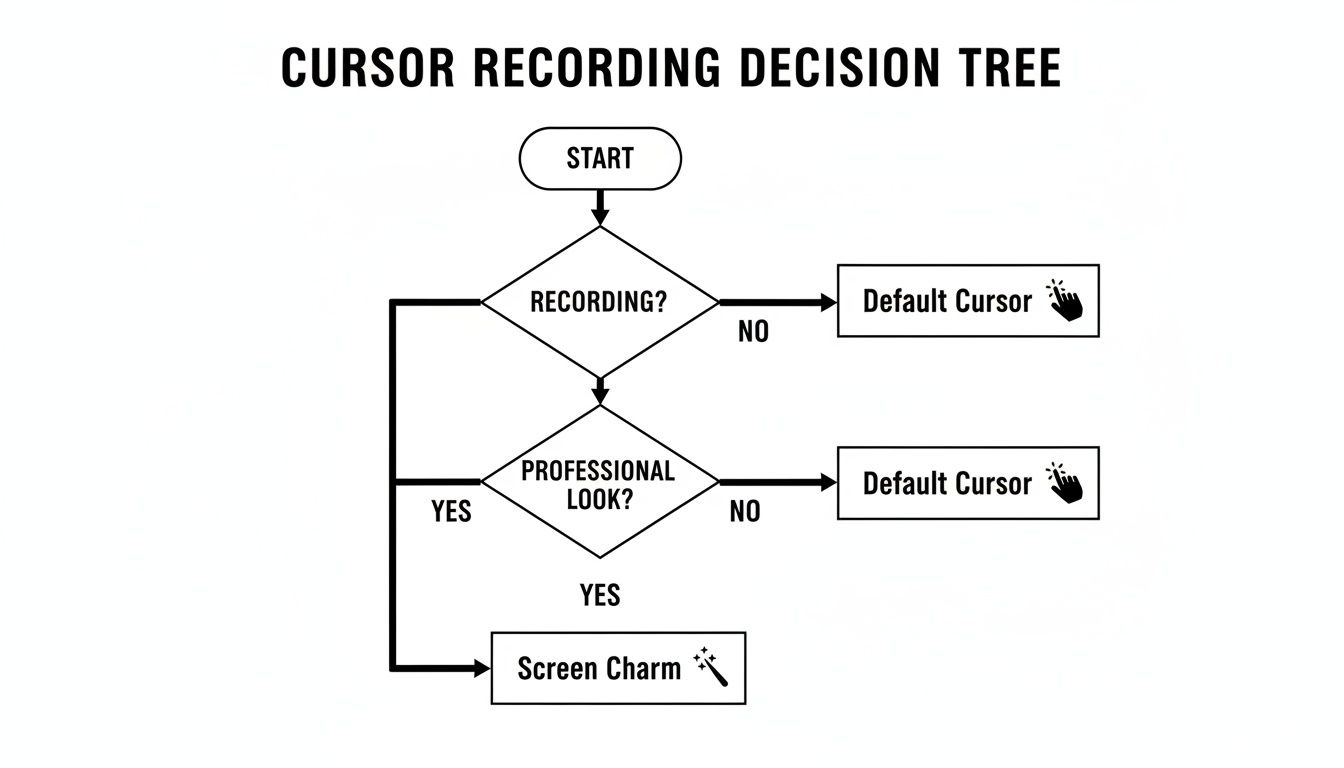
The takeaway here is that for any recording that needs to look professional, a purpose-built tool gives you the control and quality that default settings just can't offer. This is especially true as more of us create video tutorials and demos, a trend you can see discussed more on YouTube.
When a single video can reach thousands of people, a clear, on-brand cursor becomes a necessity, not a luxury. It’s why a one-time purchase like Screen Charm's $79 for unlimited 4K exports makes so much sense for modern creators.
Comparison of MacBook Cursor Customization Methods
To make it even clearer, here’s a quick side-by-side look at how these different methods stack up. Use this table to find the perfect fit for your specific needs.
| Method | Primary Use Case | System-Wide Change | Recording Features | Cost |
|---|---|---|---|---|
| macOS Accessibility | Daily visibility & personal comfort | Yes, permanent | None | Free |
| General Third-Party Apps | Live presentations & temporary effects | Yes, while active | Click animations, spotlights | Varies (Free to Paid) |
| Screen Charm | Professional screen recordings | No, only in video output | Fully customizable, branded cursors | One-time fee |
Ultimately, choosing the right method ensures your cursor is an asset, not an afterthought—whether it's for your own comfort or for creating crystal-clear content for your audience.
A Few Common Questions About Changing Your MacBook Cursor
As you start playing around with different ways to change the cursor on your MacBook, you'll probably have a few questions. Let's tackle some of the most common ones that come up, whether you're sticking to macOS settings, trying a third-party app, or getting set up for screen recording.
Can I Use a Custom Image for My MacBook Cursor?
This is easily the most popular question, and unfortunately, the direct answer is no—at least, not in the way you might hope. macOS doesn't have a built-in feature that lets you upload your own image files (like a PNG or GIF) to serve as your system-wide cursor. The options in Accessibility are all about tweaking the size and color of the standard pointer.
If you're determined to use a completely custom graphic everywhere on your Mac, you'd have to turn to a third-party application. Just remember the potential hiccups we talked about earlier, like software compatibility and system updates breaking things.
But for content creators, there's a much smarter solution.
Tools designed for screen recording, like Screen Charm, get around this problem beautifully. They let you pick unique cursor styles or even add your own branded icons that only show up in the final video. You get that custom, polished look for your audience without messing with your daily system settings.
Will Changing My Cursor Slow Down My Mac?
It's a fair question, but for the most part, you don't need to worry about performance. Tweaking the cursor's size and color using the native macOS Accessibility settings has practically zero impact on your Mac's speed. These features are baked right into the operating system and are incredibly efficient.
With third-party apps, the story is a little different. A simple app that just swaps out the cursor color is unlikely to cause any noticeable lag. However, more complex tools that introduce fancy animations or visual effects might use a tiny bit of extra CPU power. On any reasonably modern Mac, you'll probably never notice, but it's always a good idea to download well-reviewed software from trusted sources like the Mac App Store.
Recording software is a different beast altogether. These specialized tools are built from the ground up to be lean and efficient, capturing your screen and cursor without bogging down your Mac's performance.
How Do I Reset My Cursor to Default?
So you've tried a giant, bright pink cursor and decided it's not for you. Getting back to the classic look is dead simple—there's no hidden "reset" button you need to find.
Just head back to where you started: System Settings > Accessibility > Display and click on the Pointer tab.
All you have to do is undo the changes you made:
- Pointer size: Slide it all the way to the left to the 'Normal' setting.
- Pointer outline color: Click the color box and choose the default white.
- Pointer fill color: Click its color box and switch back to the default black.
That's it! Your cursor will instantly snap back to its original factory look. The whole process takes just a few seconds.
Ready to create stunning product demos and tutorials with a perfectly customized cursor? Screen Charm gives you all the tools you need to record polished, professional videos effortlessly. Download Screen Charm today and see the difference